Copyright © 2006-2008 Jaeden Amero
| Revision History | ||
|---|---|---|
| Revision 6.1 | 14 Dec 2008 | jna |
| This manual has been updated for use with libnds 1.3.1. | ||
| Revision 6.0 | 03 Jan 2008 | jna |
| This manual now covers additional aspects of Nintendo DS Programming including multiple sprites, multiple backgrounds, multiple palettes, the touch screen, Slot-1 devices, and more. The manual's case study has undergone a significant rewrite and covers more ground than ever before. | ||
| Revision 5.0 | 31 Mar 2007 | jna |
| Made Editing improvements. Manual is now DocBook formatted. | ||
| Revision 4.0 | 31 Oct 2006 | jna |
| Added VRAM Appendix, updated page layout, fixed even more typos. | ||
| Revision 3.0 | 23 Sep 2006 | jna |
| Added a sound chapter | ||
| Revision 2.2 | 12 July 2006 | jna |
| Various typo fixes | ||
| Revision 2.1 | 13 May 2006 | jna |
| Fixed some code, spelling, and stupid little extra words. | ||
| Revision 2.1 | 21 Mar 2006 | jna |
| Finalized many chapters and improved code. | ||
Table of Contents
- Preface
- 1. Politics of the Nintendo DS Homebrew Movement
- 2. What is a passthrough device and how do I use one?
- Purpose of the Passthrough
- How a PassMe Works
- History of the Passthrough
- The Future is Now, and Now, and Now, and Now
- About the NoPass
- About Slot-1 Devices
- How do I get a Passthrough
- Which Passthrough Should I Buy?
- How would I choose an old style passthrough?
- PassMe 2 Buying Tips
- How do I use my Passthrough
- What to do with your Passthrough
- 3. How do I get programs into my Nintendo DS?
- 4. How do I create programs?
- 5. How do I display a background?
- Some Background Information
- The 2D Graphics Engines
- The Fifth Mode
- A Fine Affine Background
- Coding with this Manual
- Initializing the Hardware
- Configuring the VRAM Banks
- Setting up the Affine Backgrounds
- Fixed Point Number Primer
- The Basics of DMA
- Working with the Makefile
- Gritty Crash Course
- Putting in the Star Fields
- Compiling
- 6. What is a sprite? How do I use them?
- Magical Fairies?
- The OAM
- Information About the Sprite Hardware
- How Sprites are Stored in Memory
- Sprite Attributes
- Updating the OAM
- Initializing the OAM
- Rotating Sprites
- Showing and Hiding Sprites
- Moving Sprites
- Setting Sprite Priorities
- Using the Sprites
- Setting up VRAM for Sprites
- Sprite Tile Addressing
- Loading in a Sprite
- What are assertions?
- Displaying the Sprites
- Compiling
- 7. Basic Game Mechanics Applied to the Space Shooter Genre
- 8. Nintendo DS Input Systems
- 9. What about the sounds?
List of Figures
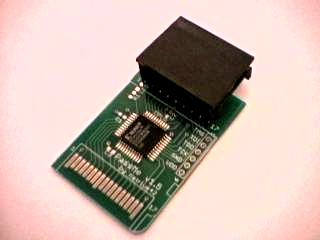
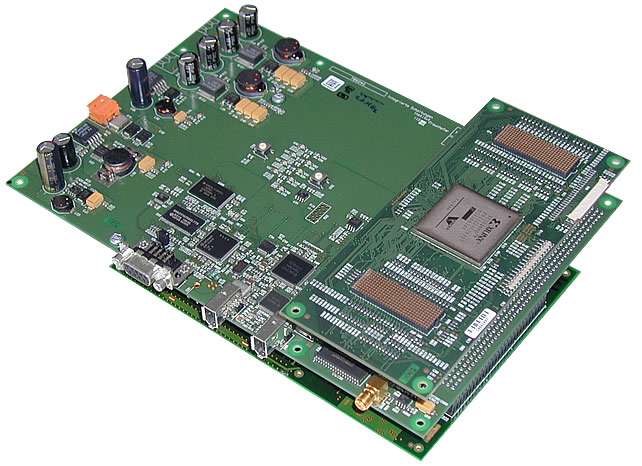
- 2.1. Picture of an early PassMe (left) and an FPGA (right)
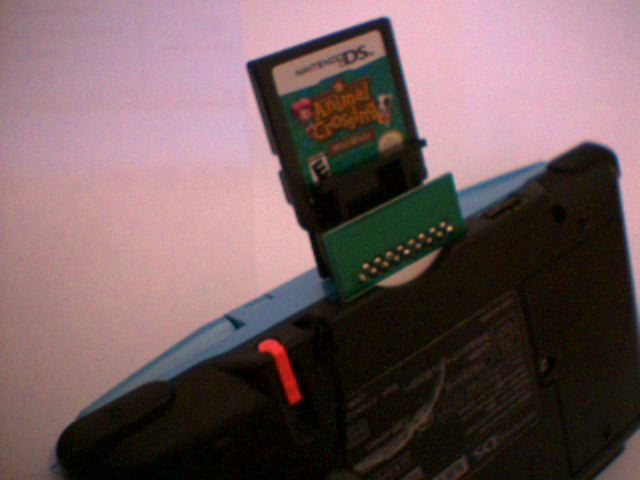
- 2.2. The PassMe inserted into the DS card slot
- 3.1. Comparison of GBAMP (left) and a GBA flash cart (right) inserted into a DS
- 5.1. The Raster Display
- 5.2. libnds Affine Background API
- 5.3. Integer variables can be used to represent fractions.
- 5.4. The program should look like this when run.
- 6.1. The upper text shows information as it would be on a non-tiled background. The lower text shows the same data, tiled, for use in tiled graphic modes.
- 6.2. Output with both backgrounds and a sprite.
- 8.1. Flying around in the Orange Shuttle.
- 9.1. Flying around in the Orange Shuttle, with sound!
List of Tables
Table of Contents
You love playing games on your Nintendo DS. Every game you've played has been a wonderful experience, each one leaving a lovely aftertaste on your gaming tongue. You may have wondered to yourself what it'd be like to create games, to offer your own software up for licking. You've drawn diagrams of games you'd love to make, worlds you want to share with others. But how to go about it? You think and are lost: you are stuck. Where do I start? Whats going on inside that pretty little dual-screen box?
This manual is designed to help you get an idea of whats going on inside the Nintendo DS. With a bit of effort and time, you'll be on your way to creating your own games. Join us, the homebrew community. You'll have a great time giving others a great time, collaborating on projects, and feeling the rush of intense and under pressure coding for numerous programming competitions competitions.
This manual is the start of the solution. In it, I will cover the basics of programming the Nintendo DS starting with an explanation of the politics behind the homebrew movement and through the emergence of passthrough devices, how to choose between a Slot-1 device or a Slot-2 device, , how to choose a passthrough device, setting up the programming environment, displaying backgrounds, using sprites, and basic game programming techniques. All these things will be discussed in the context of the creation of a simple game I concocted one weekend entitled "Orange Spaceship."
I assume you know a bit of C or C++ coding. If not, spend at least 20 hours making a variety of programs on your own in addition to completing some tutorials. It doesn't matter what you write, so long as you make sure you have a solid understanding of structs, classes, the heap, loops, bitwise and logical operators. I recommend the following tutorial and reference as a great place to get started learning, http://www.cplusplus.com/doc/tutorial/ and http://www.cppreference.com/.
Next, just read through the chapters one by one, making sure you understand the current chapter before moving to the next. Code listings will be on a gray background. Follow along with the code listings, writing your own code based on the listings.
Table of Contents
Since the Nintendo DS debut, Nintendo enthusiasts ranging from pre-pubescent kids to 30-year-old college dropouts have been wanting to develop their own games and applications for the Nintendo DS. Nintendo has stated that the DS stands for "Developer's System". For those worthy enough to land a nice developing contract with Nintendo, it truly is. However, most people will never receive this contract, special permission from Nintendo to commercially produce games for the Nintendo DS. In order to obtain a contract with Nintendo, you must prove your worthiness by showcasing an amazing game or other piece of software to them. You must have a stable financial history and expected stable financial future. You must have ample funding to buy all the official Nintendo equipment to develop for the system. Most game development houses don't even get that far. Most games on the market today are put out by what is referred to as a publisher. Game development houses will produce their game partially, show it to a publisher, and the publisher (who already has this development contract with Nintendo) will fund the game development house and market their game. All this bureaucracy makes it very difficult for the common person to produce their own, personal-use games.
This is where the homebrew movement comes in. Dedicated hobbyists spend weeks reverse engineering the Nintendo DS hardware, just to make it possible for common people to produce for the system (by providing a cheap alternative to official Nintendo development). These dedicated hobbyists come from all walks of life and cultures, many from Europe and the U.S., and bring with them great knowledge. These people make up the homebrew movement.
Homebrew is legal for a number of reasons. You own the hardware you reverse engineer, so you are free to do with it as you will so long as you don't break the law. Breaking the law would include breaking proprietary copy protection, pirating video games, publishing illegally obtained trade secrets, or otherwise trying to profit off someone else's hard work. Homebrew poses no threat to the official developer kit, as it is so primitive in comparison. Even if you made something to compete with officially produced software, it would be near impossible to publish it. Companies often benefit from homebrew communities. Although software pirates often steal from homebrew discoveries to pirate software, the homebrew community abhors piracy and takes a strong stance against it.
When you buy a piece of hardware, you own it. This means that you are free to break it open, dive into it, reverse engineer it, and so forth. You may void your warranty, but thats the price for learning the intimacies of any system. The only illegal things on this line would be to put into production and sell products made with patented features (without negotiating a production deal with he patent owner), bypassing or breaking copy-protection, or stealing software code. Reverse engineering to learn about how the hardware works and to make something fun for the community is totally fine.
The homebrew tools available for game programming are far behind anything the game company who produced the system could provide (the official development kits). Game system developers have an intimate knowledge of the hardware, as they developed it. The homebrew community has only outsider knowledge through experimentation with the hardware.
It would be close to impossible to publish a game made with homebrew tools. Nintendo would not license your game. It would be hard to find another publisher who would try to publish something made with homebrew tools against Nintendo's will. On other systems besides the Nintendo DS, this is also true.
Companies often don't have a problem with homebrew because it increases the demand for their gaming systems and helps them to learn more about their consumer base. One example of this is with the Xbox. The Xbox homebrew community made the Xbox do things that Microsoft never thought consumers wanted like playindie games, emulate classic game systems, run the Linux operating system, and so forth. Microsoft then included a lot of these features (excepting Linux, of course) in their most recent gaming console, the Xbox 360 via a system called XNA Game Sudio and Xbox LIVE Arcade (XBLA). If a company wants to squash homebrew developers for whatever reason, they'll be smashing an essential fan base that loves that company's hardware design and has the potential to improve it (all at no cost to the company). Homebrew caused such a high demand for the Xbox that it would not have been in Microsoft's best interests to ignore or punish it.
The downside of homebrew is that software pirates often steal from the discoveries of homebrew and use that information to bypass copy-protection and to pirate games. Some companies may take a stance against homebrew for this reason, but doing so is unproductive. Piracy is regrettably inevitable in any industry. It is extremely destructive, annihilating game development houses because publishers will no longer publish their games due to a high piracy rating on the platform the game developers are developing for. Homebrew developers know this, and as the amateur brothers of the official game developers, they share the pain. Homebrew will usually keep all information regarding copy-protection in high secrecy; even if they know how to copy games, they will not share the information. The homebrew community does not want to see the the system they so dearly love come to an early death.
Table of Contents
- Purpose of the Passthrough
- How a PassMe Works
- History of the Passthrough
- The Future is Now, and Now, and Now, and Now
- About the NoPass
- About Slot-1 Devices
- How do I get a Passthrough
- Which Passthrough Should I Buy?
- How would I choose an old style passthrough?
- PassMe 2 Buying Tips
- How do I use my Passthrough
- What to do with your Passthrough
The purpose of the pass through is to allow the running of programs on the Nintendo DS through the Game Boy Advance (GBA) cartridge slot. This is done because normal Nintendo DS games, which run from the Nintendo DS (NDS) card slot, are encrypted. Since it might be illegal to break that encryption, as it is a form of proprietary copy protection, we have to get the Nintendo DS to run code from a different place than the NDS card slot. Also, it is much easier to bypass the encryption than to try and break it.
When the Nintendo DS first boots, it reads a header from the Nintendo DS card inserted into the NDS card slot. The Nintendo DS will read a small block of information from the beginning of the game, known as the header, which contains information about the game (including the title of the game, date it was released and by who, the icon, and some hardware information). This header contains a pointer to a location in memory to begin executing code. The passthrough's job is to read this header and modify it to point to a location someplace on the GBA cartridge inserted into the GBA cart slot. What location would this be? Why, our code of course.
DarkFader (Rafael Vuijk) may have been the first to create a passthrough device. He designed his passthrough with an FPGA (Field Programmable Gate Array) and later packaged it into a single CPLD. Many other people (including Kraln, Firefly, and Natrium42) have developed a passthrough independently from DarkFader, but he is self-credited as its initial creator.
Over the next few months following the creation of the passthrough, Lynx and Natrium42, both major players in the early homebrew community, started their own online stores selling pre-made passthrough devices called "PassMe"s. Many budding DS programmers bought their first passthrough from Lynx or Natrium42's stores (myself included). However, passthrough devices are not commonly used anymore. Natrium42's store no longer sells them and Lynx's store no longer exists.
The PassMe was the first device invented to allow homebrew software to be run on the Nintendo DS. After Nintendo decided to crack down a little harder, in efforts to prevent piracy, these devices no longer worked on new Nintendo DS systems. The community then developed the PassMe 2. This device was more fancy in how it bypassed the copy protection of the Nintendo DS and also required the operator to have more resources (a GBA flash cart with SRAM) and go through a more involved process. After a while, a device called the NoPass surfaced.
A NoPass pretends to be a real Nintendo DS game card. It contains code that is encrypted in the same manner as a real Nintendo DS game. The encryption was broken by Martin Korth, who discovered a way to dump the Nintendo DS BIOS. He then reverse engineered the encryption information from the BIOS code. NoPass devices are technically not considered passthroughs, since they don't bypass the copy protection of the Nintendo DS.
Recently, due to Martin Korth's work, homebrew engineers have discovered a way to create a device that runs homebrew software from the Nintendo DS card slot (Slot-1). These new devices contain small passthrough devices (of the NoPass style) inside them that allow them to bypass copy protection as well some means of providing memory to the Nintendo DS (via built-in flash memory or a microSD card slot). These devices are called "Slot-1 devices". The older style devices that plug into the GBA cart slot are referred to as "Slot-2 devices".
Today, many passthrough and NoPass devices are on the market. It is highly recommended by the homebrew community to buy one from a fellow developer and not a company that commercially produces hardware meant for pirating Nintendo DS software. Thus, one should not buy a SuperPass or SuperKey from SuperCard, a MagicKey or MK4-Mini from NeoFlash, a PassKey from G6Flash, a PassKey or Passcard from M3Adapter, or a Max Media Launcher from the horrid Datel (a very unprofessional company run by immature anti-Nintendo kiddies). Each of these companies manufactures hardware that is used to pirate Nintendo DS software and should be avoided at all costs. Passthrough devices are not commonly used today, and may therefore be difficult to purchase.
It is recommended that you purchase a NoPass or a Slot-1 homebrew device, as these work on all Nintendo DS systems with no troubles or other complications whatsoever. The older passthroughs, like PassMe, don't work on all Nintendo DS systems, and the PassMe 2 requires extra work and resources to use, not to mention they both stick out of your Nintendo DS like a sore thumb and are hard to keep in your pocket.
Slot-1 devices also have many other advantages over Slot-2 devices and passthroughs. You definitely want to get a Slot-1 device. For instance, Slot-2 devices suck up a lot more power than Slot-1 devices do. This means that using a Slot-1 device will give you more battery life than using a Slot-2 device. Many Slot-1 devices also double as NoPass devices, so you don't need to buy both a passthrough and a Slot-2 device anymore.
If you still want to buy an old fashioned style passthrough, there are a number of things you'll need to consider. Depending on what kind of Nintendo DS you have, you can buy either of two different types of passthrough devices. The first one, akin to the original made by DarkFader, is the "PassMe". The PassMe will probably work on most early "phat" (non-Nintendo DS Lite) Nintendo DS systems.
However, if your Nintendo DS is newer (both phat and Lite systems can be new), you will most likely need a "PassMe 2". The need for a PassMe 2 came about because of a change in the firmware of newer Nintendo DS systems. These newer systems do not allow the header to be changed to point to code in the GBA slot. However, it is possible to point to code in the GBA carts SRAM still. The PassMe 2 points to some certain instructions that have been loaded into memory by the currently inserted DS game. This location is an SWI (software interrupt) call to the SRAM on the GBA port. The GBA carts SRAM contains the necessary code to jump to code lo- cated on GBA cart. The DS then is told to run this code and thus redirects to code in the GBA slot. Each PassMe 2 has to be programmed to work with one specific game, as the certain code to redirect to the GBA slot is found in different places within different DS games.
There are a few tricks you can pull to determine your firmware version. It involves pictochat and pulling a cartridge out of your Nintendo DS. The screen will change a certain color. Based on this color you can determine if you need a PassMe 2 or not. Table 2.1, “When ejecting the game, you'll discover your firmware version as shown.” will help you discover which firmware version you have.
Procedure 2.1. Checking the Firmware Version
Insert and Nintendo DS game into the DS card slot.
Turn on the Nintendo DS. (If you have auto start enabled, hold down Start and Select when you boot the system.)
Start Pictochat by pressing the Pictochat logo on the menu screen.
Join any room you wish.
Remove the Nintendo DS game inserted into the back of the system.
You will notice either Pictochat freezing or both screens will change color.
Table 2.1. When ejecting the game, you'll discover your firmware version as shown.
| Observed Results | Firmware Version |
|---|---|
| Pictochat froze | Version 1 |
| Both screens turned periwinkle | Version 2 |
| Both screens turned dark green | Version 3, iQue, or Flashme |
| Both screens turned marigold | Version 4 |
| Both screens turned magenta | Version 5 |
| Both screens turned dark blue | Version 6 |
It is recommended that you purchase a NoPass instead of a PassMe or PassMe 2 passthrough device if you are unsure which to get, as they are guaranteed to work with all Nintendo DS systems, past, present, and future. If you have a friend with a newer DS who may need to borrow your NoPass to play your games, it's always helpful to have a universal method of running them.
When ordering a PassMe 2, be sure to select one pre-programmed to a common game that you own, such as the Metroid Prime Hunters Demo or Super Mario 64 DS. Each PassMe 2 must be programmed to a specific game and it is best to select a game that is in large supply. Also, you'll need a GBA flash cart with some SRAM on it. Most GBA flash carts have SRAM, but be sure to check your cart before trying to obtain a PassMe 2. Some newer GBA flash carts might only support save games on flash, so simply knowing that your flash cart supports save games isn't enough.
Using a passthrough device is quite simple. Simply insert a game into the card slot on the passthrough and plug the device into the DS card slot on the top of your DS, like any other game. Figure 2.2, “The PassMe inserted into the DS card slot” illustrates what this looks like.
One of the best things to do once you get your passthrough is to install a patch to your Nintendo DS firmware known as "FlashMe." This firmware patch allows for the running of unsigned wifi binaries as well as the redirecting of the Nintendo DS to boot from the GBA slot in NDS mode. This means that after installing FlashMe, you no longer need your PassMe. FlashMe is the preferred and recommended method of running your own software. You no longer have to lug around a passthrough or play with a large block sticking out of the back of your DS. Also, you can send your code via wireless multiboot (WMB), if you so desire, and avoid having to use a flash cart. In addition to all those things, in case you ever come across some malicious code that zaps your firmware or otherwise messes up your DS, FlashMe keeps a recovery program in the protected firmware space that you can run to save your DS. Because of this feature alone, FlashMe is better than the standard firmware. FlashMe can be obtained from http://home.comcast.net/~olimar/flashme/.
Table of Contents
There are a few ways of getting your code into the Nintendo DS. The first of which is the simple GBA flash cart. These flash carts are generally quite expensive, have a low availability, and don’t hold very much memory. They fit into the phat Nintendo DS systems perfectly and do not stick out from the bottom, except on the Nintendo DS Lite, as other things do. The second way of running code is on a removable memory device. These kinds of devices come in two flavors: Slot-1 and Slot-2. Slot-2 devices, such as the M3 Adapter, G6 Flash, NeoFlash, SuperCard, and the GBA Movie Player, generally support both Nintendo DS and GBA software. Slot-1 devices, such as the M3 Simply, R4DS, M3 Real, DS-X, NinjaDS, and the Cyclo DS Evolution, generally only support Nintendo DS software. Slot-1 devices also fit into the Nintendo DS perfectly. The first four of those Slot-2 devices are produced by supporters of piracy and should be avoided. It is recommended to use the GBA Movie Player (GBAMP) if you want to use a Slot-2 device. With Slot-1 devices, we don't have too much of a choice but to choose the lesser of many evils.
As there are no homebrew produced devices made by hombrew people for homebrew people (yet), we regretfully have to buy devices designed and sold for piracy when buying NoPass or Slot-1 devices. That said, the most important feature to consider when buying one of these devices is DLDI support.
DLDI stands for dynamically linked device interface. In order for the homebrew filesystem, known as libfat, to work, you'll need a device which supports the DLDI standard. DLDI specifies a system by which DLDI modules can be dynamically loaded into homebrew software. This allows developers to release one version of their homebrew which the software end users simply patch and then run on a device of their choice. If you buy a device that does not support DLDI, you will be out of luck when wanted to run a majority of the homebrew applications and games out there. Not to mention that the company producing the device is essentially saying, "We don't need to spend time catering to the homebrew community since our device is designed just for piracy." We'd be better off not supporting that kind of company with our business.
You can learn more about DLDI and how to use it at the DLDI Wiki website, http://dldi.drunkencoders.com/index.php?title=Main_Page.
There are so many Slot-1 devices on the market today. Choosing one of them has become very difficult, as the choices are so many. In this manual, I'll discuss the devices I'm familiar with, which nifty features they propport, and how they compare to one another.
This device is built well. It is the most sturdy of the three. It uses microSD cards for storage and supports DLDI. This means that you can run homebrew software and use the microSD card's filesystem. With the most recent firmware, it can even automatically patch generic DLDI homebrew software with the proper DLDI driver for the R4DS on the fly. This means that you don't have to use your PC to patch your homebrew software before placing it onto your microSD card. The R4DS cannot use microSDHC cards, however. Some people have complained about the spring loaded microSD slot, so the makers of R4DS have removed it from current models. The R4DS is a great device overall and well supported by the Nintendo DS homebrew community, but it does not support running GBA software unfortunately.
This device comes in varying configurations for your various needs. It comes with both a Slot-1 device and a Slot-2 device. The Slot-2 device is what differs between the three M3 Real configurations. In the first and cheapest configuration, the Slot-2 pack is simply a rumble pack. In the second and more expensive version, the Slot-2 pack is a dual rumble and RAM pack. This configuration will also run GBA homebrew. The flash cart size is kept secret by M3, for some reason. Natrium42 was kind enough to inform me that, after doing a few tests on the pack, that it is at least 8MB in size, but lacks SRAM. The third and most expensive configuration, dubbed the "GBA Expansion Package", provides a Slot-2 pack with rumble, SRAM, and 32MB of RAM.
The M3 Real supports DLDI as well. I'm not sure if it can automatially patch homebrew with its own driver on the fly, however. The homebrew software may need to be patched on a PC before being transferred to the SD card.
The M3 Real supports microSD and microSDHC cards, unlike the R4DS. So if you are in the mood for massive storage, the M3 Real can be your friend.
This device has very recently come to market, but is already making a big impression in the community. The Cyclo DS Evolution has the best looking and functioning menu system of the three devices, in my opinion. And if you don't like it, the menus are skinnable with a number of skins already available for the device. You might be thinking, "Why would I care what my menus look or act like?" Well, when you use the device to load your software over and over and over again, bad menus really piss you off. When you can't use the touch screen to scroll up and down and select items and have to use the keys, but holding down the keys doesn't make the menu scroll by and you have to press the up and down buttons a lot to get to your software, you get pissed off. And yes, there really are menus that are this bad.
Aside from the pleasant menus, the Cyclo DS Evolution supports DLDI. It also features on the fly DLDI patching. I dislike having to patch my games on my PC before loading them onto my microSD card, so this is a great feature.
My favorite feature of the Cyclo DS Evolution is the "remember what I loaded last time and load that same program again" feature. Simply holding down L and R at boot will boot the last thing that was booted. This enables me to avoid navigating the menu system when I'm debugging a program and running it repeatedly for testing.
The Cyclo DS Evolution also has a NoPass mode where it will act as a NoPass to boot your GBA flash carts, a GBA Movie Player, or any other Slot-2 device.
As you've probably noticed, as I've written the most about the Cyclo DS Evolution, that I like it the best of the three devices. It is competitively priced with the others, which is good. While it doesn't support running GBA software, it feature rich on the Nintendo DS side of things. I recommend the Cyclo DS Evlolution to meet all of your Slot-1 needs and desires.
Out of the many places to buy these devices, I've been most happy with electrobee. electrobee is run by a trusted member of the homebrew community and ships worldwide from good ol' Canada (as opposed to who knows where). Their prices are quite often the best, too. When you are ready to purchase a Slot-1 device, I recommend that you visit electrobee.com.
If you decide that GBA software development is important for you, you might want to consider getting a NoPass and a Slot-2 device. The NoPass will allow you to run Nintendo DS software from your Slot-2 device. The Slot-2 device, on its own, will be able to run GBA software. If you only care about Nintendo DS software, a Slot-1 device will meet your needs well.
The GBA Movie Player is a wonderful device which can run your software from a Compact Flash card. Compact Flash cards are very cheap and in high supply. If you have more SD cards than CF cards around, unfortunately, the only way to run NDS software from an SD card at this time is with the SD versions of the SuperCard or M3 Adapter. The GBAMP also sticks out from the bottom of the Nintendo DS a little, as shown in Figure 3.1, “Comparison of GBAMP (left) and a GBA flash cart (right) inserted into a DS”
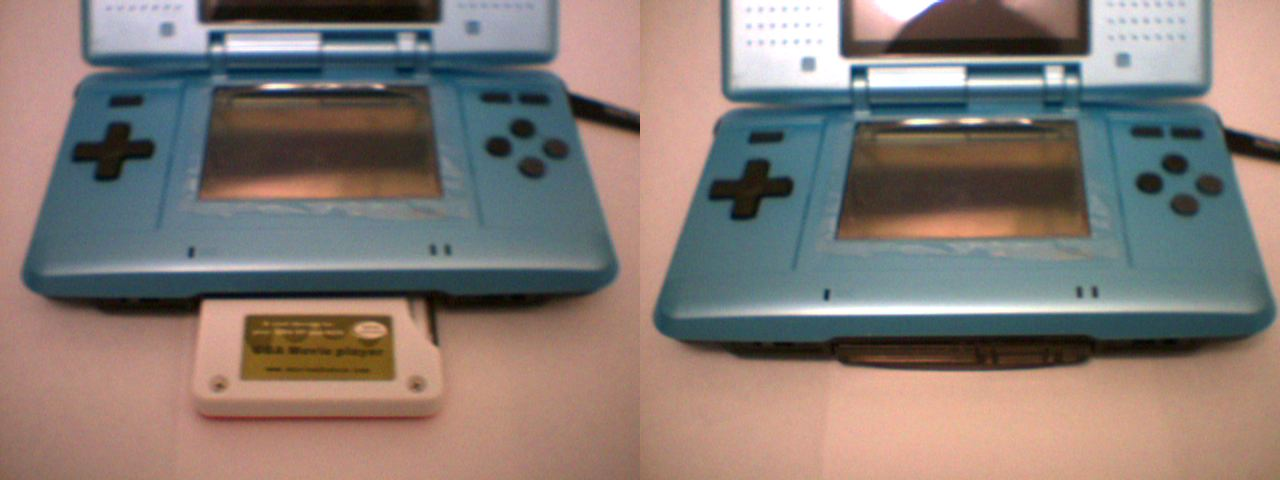
With the GBA flash cart, the process of loading your programs into memory is a bit slow. Also, each GBA flash cart writer is specific to certain carts and often have closed source drivers. This means that most flash carts will be incompatible with Linux or Macintosh computers. In actuality, the only good thing about a GBA flash cart is that it does not stick out from the Nintendo DS, as can be seen in Figure 3.1, “Comparison of GBAMP (left) and a GBA flash cart (right) inserted into a DS”.
If you chose to go with the GBA flash cart, you can use a utility called Darkain’s MultiNDS Loader to load multiple programs onto your flash cart. This way, you don’t have to re-flash your cart each time you want to run a different application.
If you chose to go with the GBAMP, then I’d highly recommend DragonMinded's DSOrganize. It supports booting multiple programs, text editing, address books, calendars, and more. It's a great application for the DS. You can get it from http://www.dragonminded.com/?loc=ndsdev/DSOrganize. However, you cannot use a stock GBAMP to run NDS programs. You have to flash it with some custom firmware. Instructions and firmware are available from http://chishm.drunkencoders.com/NDSMP/index.html.
As for Slot-1 devices, these all usually come with their own menu systems (often incorrectly referred to as operating systems). You won't have to do anything special to run multiple software titles.
Table of Contents
devkitPro brand name, like Microsoft or Adobe. You don't use devkitPro to build your Nintendo DS software anymore than you write your letters with Microsoft or edit photos with Adobe. devkitPro produces a collection of toolchains for homebrew developers. Toolchains are available for Game Boy Advance, GP32, Playstation Portable, GameCube, and the Nintendo DS. The toolchain we are most interested in is known as devkitARM.
devkitARM is a specific toolchain of devkitPro. It allows the compiling of ARM binaries from most all computers. It is based on gcc, the gnu compiler collection. devkitARM includes everything you'll need to create software for the Nintendo DS, GBA, and GP32; all of which are run by the ARM processor. However, we will be using something to make our job much easier in addition to just devkitARM.
libnds, the library for Nintendo DS, started out its life as NDSLIB. NDSLIB was a simple library created by joat (Michael Noland) and dovoto (Jason Rogers). The name was changed to libnds over the course of a few months and the maintainer has been changed to WinterMute (Dave Murphy).
NDSLIB started out as a collection of defines for common memory locations in the DS. This is useful, as you can simply reference BG_BMP_RAM instead of 0x06000000. Eventually, the library began to include structs and unions and other useful constructs that help to simplify the programmers job and abstract certain portions of the hardware from the programmer.
Today, libnds is an incredibly useful library that over 96% of the Nintendo DS homebrew community uses.
Installing devkitARM is quite simple. Directions are already documented on their website. Visit http://www.devkitpro.org/setup.shtml for directions. Although more geared towards Windows, the installation is fairly straight forward. Automated installers are available for Windows, Macintosh, and Linux.
libnds's source install is less documented than devkitPro's source install, but is also quite simple in comparison. libnds is automatically installed by the automated installers of devkitARM. However, if you want to view the libnds source code, you'll have to install it from source.
Procedure 4.1. To install libnds from source
Simply download the latest source from SourceForge.net.
Extract it to $DEVKITPRO/libnds.
                        patater@patater.com:~$mkdir
                        $DEVKITPRO/libnds
                        patater@patater.com:~$mv
                        libnds-src-*.tar $DEVKITPRO/libnds/
                        patater@patater.com:~$cd
                        $DEVKITPRO/libnds
                        patater@patater.com:~$tar
                        -xvjf libnds-src-*.tar.bz2 $DEVKITPRO/libnds
Change your current directory to $DEVKITPRO/libnds and type make.
                        patater@patater.com:~$cd
                        $DEVKITPRO/libnds
                        patater@patater.com:~$make
If devkitARM is installed properly, libnds will compile in a matter of seconds and you'll be on your way to developing software for the Nintendo DS.
Now that you have devkitARM and libnds installed on your computer, you have everything you need to start coding, excepting perhaps a bit of knowledge on how to code specifically for the unique harware of the Nintendo DS. In the next chapter, we'll cover the basics of displaying a bitmap on the screen.

Table of Contents
- Some Background Information
- The 2D Graphics Engines
- The Fifth Mode
- A Fine Affine Background
- Coding with this Manual
- Initializing the Hardware
- Configuring the VRAM Banks
- Setting up the Affine Backgrounds
- Fixed Point Number Primer
- The Basics of DMA
- Working with the Makefile
- Gritty Crash Course
- Putting in the Star Fields
- Compiling
Since the beginning of time, humans have used raster displays to draw electronic images. Raster images aren't used too much anymore, in practice. However, most all displays still act like raster displays from a programming perspective. Each physical display on the Nintendo DS is actually an LCD screen which works nothing like a raster display in actuality, but the electronics that control it provide an interface to the graphics engines on the Nintendo DS that is very much like a raster display.
So what is a raster display? Put simply, it is just like a television display. A beam of electrons blasts away at the back of a phoshor coated screen in a deterministic way (known as a raster scan). The beam, from the perspective of a person watching the television, travels from left to right, one scan line at a time. The beam never blast electrons from right to left. After the beam reaches the right edge of the screen, it turns off and moves to the right and down one line. When the beam finally reaches the bottom line of the screen, it travels back up to the upper left of the screen and begins this drawing process all over again. Figure 5.1, “The Raster Display” illustrates this process in an exaggerated fashion.
Two things are important to remember here. First, that the period of time during which the beam goes from right to left (not drawing anything) is called the horizontal blanking period, or hblank. Second, that the period of time during which the beam goes from bottom to top (again, not drawing anything) is called the vertical blanking period, or vblank. Knowing about vblank is useful for us as Nintendo DS programmers because it is the period of time in which we will tell the Nintendo DS to draw things. If we didn't, then the Nintendo DS display might be in the middle of drawing the screen when we tell it what to draw. This would give us strange artifacts and is generally undesirable.

The Nintendo DS has two screens. As such, it has two graphics engines, one for each screen. The first engine is referred to as the "main" engine, while the second is called the "sub" engine. Both of these engines can put in charge of either screen. By default, libnds tells the main engine to operate the top physical screen and the sub screen the bottom physical screen.
Each engine supports up to four backgrounds and up to 128 sprites. They operate independently of each other, each with their own control registers, backgrounds, sprites, graphics data, and palettes. To use an engine, we must first turn them on. Then we place the engine into a certain mode of operation. Next, we map memory for use with the engines. Finally, we load their memory with graphics data and palettes and they automatically just draw what we've set them up to do.
Each of these graphics engines can be placed into one of seven different modes that support different features. In this manual, we'll cover one of the more common graphic modes, Mode 5. It is commonly used because it is very flexible and allows for some amazing special effects. We'll learn how to display multiple 15-bit color 1-bit alpha affine backgrounds in this chapter. Mode 5 consists of four different backgrounds each with their own capabilities. Table 5.1, “Mode 5 Information” shows how flexible Mode 5 can be.
An affine background, also known as an external rotation background or exrot background, is one that has the ability to be transformed by an <glossaryterm>affine transformation matrix</glossaryterm>. Since linear algebra is beyond the scope of this manual, I will cover briefly how to set up a basic affine background, but not get into rotating, scaling, or sheering it. For this manual, we'll just apply an identity transform, a transform that doesn't actually change the background, to our backgrounds. With an affine transformation matrix, you can rotate, scale, and sheer an affine background, among other interesting effects. If you want to learn about the cool effects you can do with an affine background and an affine transformation matrix, I recommend you look at Cearn's tutorial on affine transformations at http://www.coranac.com/tonc/text/affine.htm.
Since this is the first time in this manual where we'll start to write code, we should be aware of the resources available to assist us in following along with this manual. If you haven't already done so, download the sources that accompany this manual from the manual homepage at http://patater.com/manual. After extracting the sources, you'll find a folder called code. The manual provides a template for you to use with this manual and any other Nintendo DS programming projects you might wish to start developing. This template is located in the code folder and is itself a folder called chapter_0-starting_system. The code folder also contains project folders for each chapter. If at anytime you get stuck or if you want to skip a chapter, feel free to refer the completed project for the chapter you are stuck on or to grab the completed project for the chapter prior to the one you wish to skip to. To follow along with this manual, copy the chapter_0-starting_system folder to a nice place you wish to work from (I'd copy the folder to my ~/projects directory and name the copy manual) and open source/main.cpp with your favorite text editor. (My favorite text editor is gvim.) Let's get going!
In order to get the hardware to do what we want, we have to first initialize it. This means turning on the 2D graphics core. This is where we first fall in love with libnds. (We'll fall in love with it repeatedly over the course of this manual.) libnds makes it incredibly simple to do these two things. Add the following code to your new main.cpp C++ code file.
#include <nds.h>

int main() {
    /*  Turn on the 2D graphics core. */
    powerOn(POWER_ALL_2D);

    return 0;
}
After we get the basic setup done, we now have to tell the graphics engine where to get its display data from. The two graphics engines share the same VRAM; i.e. There are not two VRAM A banks, one for the main screen and one for the sub screen. We'll use these memory locations when we load the graphics later. Let's make a function called initVideo.
void initVideo() {
    /*
     *  Map VRAM to display a background on the main and sub screens.
     *
     *  The vramSetMainBanks function takes four arguments, one for each of the
     *  major VRAM banks. We can use it as shorthand for assigning values to
     *  each of the VRAM bank's control registers.
     *
     *  We map banks A and B to main screen background memory. This gives us
     *  256KB, which is a healthy amount for 16-bit graphics.
     *
     *  We map bank C to sub screen background memory.
     *
     *  We map bank D to LCD. This setting is generally used for when we aren't
     *  using a particular bank.
     */
    vramSetMainBanks(VRAM_A_MAIN_BG_0x06000000,
                     VRAM_B_MAIN_BG_0x06020000,
                     VRAM_C_SUB_BG_0x06200000,
                     VRAM_D_LCD);

    /*  Set the video mode on the main screen. */
    videoSetMode(MODE_5_2D | // Set the graphics mode to Mode 5
                 DISPLAY_BG2_ACTIVE | // Enable BG2 for display
                 DISPLAY_BG3_ACTIVE); //Enable BG3 for display

    /*  Set the video mode on the sub screen. */
    videoSetModeSub(MODE_5_2D | // Set the graphics mode to Mode 5
                    DISPLAY_BG3_ACTIVE); // Enable BG3 for display
}
There are nine VRAM banks in total on the Nintendo DS. See Table 5.2, “VRAM Bank Information” for details about them. Our 16bit background images take up 128KB of memory each. Thus, each background has to have one whole VRAM bank assigned to it. Not all VRAM banks can be used for all purposes, however. Refer to Appendix A, for more detailed information.
Table 5.2. VRAM Bank Information
| VRAM Bank | Control Register Address | Control Register | VRAM Bank Size |
|---|---|---|---|
| VRAM_A | 0x04000240 | VRAM_A_CR | 128KB |
| VRAM_B | 0x04000241 | VRAM_B_CR | 128KB |
| VRAM_C | 0x04000242 | VRAM_C_CR | 128KB |
| VRAM_D | 0x04000243 | VRAM_D_CR | 128KB |
| VRAM_E | 0x04000244 | VRAM_E_CR | 64KB |
| VRAM_F | 0x04000245 | VRAM_F_CR | 16KB |
| VRAM_G | 0x04000246 | VRAM_G_CR | 16KB |
| VRAM_H | 0x04000248 | VRAM_H_CR | 32KB |
| VRAM_I | 0x04000249 | VRAM_I_CR | 16KB |
libnds helps us once again by provide a nice <glossaryterm>API</glossaryterm> for accessing the affine transformation matrix of a particular affine background. libnds provides access to a background's affine transformation matrix through four variables. Figure 5.2, “libnds Affine Background API” shows the names of these variables and which part of the affine transformation matrix they align with.

What we'll do now is add three backgrounds. We'll put a splash screen on the top physical screen, a starfield on the bottom physical screen, and a planet placed atop the starfield background. To do this, we'll use SUB_BG3 (although we could use SUB_BG2) for the splash screen and both backgrounds 2 and 3 on the main screen for the planet and starfield respectively. In order to make sure the planet shows up above the starfield as opposed to below it, we give the planet a priority number less than that of the starfield's priority number. Relatively lower priority numbers place backgrounds relatively above other backgrounds. There are only four priority numbers per graphics engine that we can assign to backgrounds (priority numbers 0-3).
We'll now use that nice API libnds provides us for both the background control registers and the affine transformation matrix. Let's proceed to make a function called initBackgrounds which will set up our affine backgrounds. Explanations of what is going on is the comments.
void initBackgrounds() {
    /*  Set up affine background 3 on main as a 16-bit color background. */
    REG_BG3CNT = BG_BMP16_256x256 |
                 BG_BMP_BASE(0) | // The starting place in memory
                 BG_PRIORITY(3); // A low priority

    /*  Set the affine transformation matrix for the main screen background 3
     *  to be the identity matrix.
     */
    REG_BG3PA = 1 << 8;
    REG_BG3PB = 0;
    REG_BG3PC = 0;
    REG_BG3PD = 1 << 8;

    /*  Place main screen background 3 at the origin (upper left of the
     *  screen).
     */
    REG_BG3X = 0;
    REG_BG3Y = 0;

    /*  Set up affine background 2 on main as a 16-bit color background. */
    REG_BG2CNT = BG_BMP16_128x128 |
                 BG_BMP_BASE(8) | // The starting place in memory
                 BG_PRIORITY(2);  // A higher priority

    /*  Set the affine transformation matrix for the main screen background 3
     *  to be the identity matrix.
     */
    REG_BG2PA = 1 << 8;
    REG_BG2PB = 0;
    REG_BG2PC = 0;
    REG_BG2PD = 1 << 8;

    /*  Place main screen background 2 in an interesting place. */
    REG_BG2X = -(SCREEN_WIDTH / 2 - 32) << 8;
    REG_BG2Y = -32 << 8;

    /*  Set up affine background 3 on the sub screen as a 16-bit color
     *  background.
     */
    REG_BG3CNT_SUB = BG_BMP16_256x256 |
                     BG_BMP_BASE(0) | // The starting place in memory
                     BG_PRIORITY(3); // A low priority

    /*  Set the affine transformation matrix for the sub screen background 3
     *  to be the identity matrix.
     */
    REG_BG3PA_SUB = 1 << 8;
    REG_BG3PB_SUB = 0;
    REG_BG3PC_SUB = 0;
    REG_BG3PD_SUB = 1 << 8;

    /*
     *  Place main screen background 3 at the origin (upper left of the screen)
     */
    REG_BG3X_SUB = 0;
    REG_BG3Y_SUB = 0;
}
What's up with all those "<< 8" thingies? Those are fixed point numbers. The Nintendo DS expects many values to be in varying fixed point formats. A fixed point number is simply a way of specifying multiples of fractions to represent non-integer values. For example, if we use an integer variable to store a US Dollar amount, we might initially think we can only represent whole dollar values. However, if we decide to store US pennies in the integer as opposed to whole dollar values, we can all of a sudden represent fractions of US Dollars with our integer. We can have 1.21 US Dollars by saying we have 121 pennies.
Common notation for fixed point types looks like 1.31, 1.7.24, 8.8, and etc. To interpret this notation, we read from right to left. First, we find the number of bits used to specify fractional parts. The next number will be the number of bits for whole number parts. And, if there is another number, it will usually indicate the sign of the number as being either positive or negative with one bit. Figure 5.3, “Integer variables can be used to represent fractions.” illustrates the concept of fixed point numbers.

DMA stands for Direct Memory Access. DMA allows the reading and writing of memory independently of the CPU. The Nintendo DS has special, dedicated DMA hardware to do quick and moderately effcient moving of memory. DMA is not very efficient for memory fill operations, however, as the data to fill with needs to be read once for every write. Libnds provides us with a few functions to make use of the DMA hardware in the Nintendo DS.
Whenever you have the opportunity to use DMA, you should. It is always better to use DMA than to use a for loop to copy data. When using DMA to copy from main memory, do not forget to flush main memory before using DMA. The DMA doesn't use the cache where the relevant memory may currently be stored, so flushing to main memory guarantees that DMA sees the correct data. Another issue to consider would be that in the middle of a DMA, the main CPUs are prevented from using certain memory hardware. This can cause awkward bugs with interrupt handling. For this reason, and swifastcopy may be safer, and is not too much slower. The safest bet is always memcopy and memset, if you are running into some bugs.
The declaration of dmaCopyHalfWords from libnds is as follows.
static inline void
dmaCopyHalfWords( | uint8 channelconst void * sourcevoid * destuint32 size); |
| uint8 channel const void * source void * dest | uint8 channelconst void * sourcevoid * destuint32 size const void * source void * dest uint32 size ; |
In our program, we will use dmaCopyHalfWords to load some graphics into memory. We use the function dmaCopyHalfWords instead of dmaCopy because it is more explicit as to how it is copying. We'll use the same channel (channel 3) that the ordinary dmaCopy uses, though. It also let's us specify which DMA channel to use when copying. Let's start out by writing some functions to display our backgrounds. Since we've already set up the hardware to display the data in the desired manner, right after the copy we will get some nice images displayed on our screens. If we didn't set up our backgrounds first, we'd most likely get garbage on the screen until we eventually did set up the background control registers.
/* Select a low priority DMA channel to perform our background
 * copying. */
static const int DMA_CHANNEL = 3;

void displayStarField() {
    dmaCopyHalfWords(DMA_CHANNEL,
                     starFieldBitmap, /* This variable is generated for us by
                                       * grit. */
                     (uint16 *)BG_BMP_RAM(0), /* Our address for main
                                               * background 3 */
                     starFieldBitmapLen); /* This length (in bytes) is generated
                                           * from grit. */
}

void displayPlanet() {
    dmaCopyHalfWords(DMA_CHANNEL,
                     planetBitmap, /* This variable is generated for us by
                                    * grit. */
                     (uint16 *)BG_BMP_RAM(8), /* Our address for main
                                               * background 2 */
                     planetBitmapLen); /* This length (in bytes) is generated
                                        * from grit. */
}

void displaySplash() {
    dmaCopyHalfWords(DMA_CHANNEL,
                     splashBitmap, /* This variable is generated for us by
                                    * grit. */
                     (uint16 *)BG_BMP_RAM_SUB(0), /* Our address for sub
                                                   * background 3 */
                     splashBitmapLen); /* This length (in bytes) is generated
                                        * from grit. */
}
The default template makefile will turn your graphic files into object files for linking into your program. Never include data as a header file.
The graphics must be in a lossless image format, such as gif, tif, bmp, or png in order to work with the provided template makefile. I prefer the png graphic format. Image conversion is usually done by a program called grit. The provided template makefile will ask grit to convert images in the gfx folder of your project root to a format ready for the Nintendo DS.
The provided template makefile, adapted from the default libnds template makefile, is a good base for most all projects. It will look in a folder called gfx (in the same directory as the makefile) for your graphics. If any are found, it uses a special bin2o rule to tell grit to turn your images into .o files, according to grit rule files (with the .grit files extension), which can be linked into your program. grit will create a header file (.h) for your data. The name format for them works like so: if a file is called orangeShuttle.png the header file will be called orangeShuttle.h. Inside this header file will be a reference to the data in the .o, named orangeShuttleTiles and orangeShuttlePal or orangeShuttleBitmap, depending on how the grit file specifies which format to convert your image into. It will also include the length in bytes of the data references as orangeShuttleTilesLen and orangeShuttlePalLen or orangeShuttleBitmapLen.
For our project, we'll be putting the our graphic files and grit rule files into the gfx directory and having the makefile use grit on them.
With the emergence of the awesome and multi-platform tool, grit there is no reason to not learn how to use it. It is now a standard tool in Nintendo DS and GBA development where aforeto there was no universal method of image conversion.
To use grit, we make a grit rule file. This file has the .grit file extension an contains important information telling grit how we want our image converted. You can learn about how grit works by reading its built-in help by running the command grit with no parameters. I've also provided commented grit rule files for all images we will use in this manual. These make good examples and can help you get the hang of using grit.
For more information regarding grit, you can visit the project homepage and read the grit manual at http://www.coranac.com/projects/grit/ and http://www.coranac.com/man/grit/html/grit.htm respectively. You can also download the latest version of grit from the grit project homepage.
Let's now put these functions into our main() function to get everything working together.
#include <nds.h>

#include "starField.h"
#include "planet.h"
#include "splash.h"

/* Other functions we've made are here. */

int main() {
    /*  Turn on the 2D graphics core. */
    powerOn(POWER_ALL_2D);

    /*  Configure the VRAM and background control registers. */
    lcdMainOnBottom(); // Place the main screen on the bottom physical screen
    initVideo();
    initBackgrounds();

    /*  Display the backgrounds. */
    displayStarField();
    displayPlanet();
    displaySplash();

    return 0;
}
Check over your code, referring to the included examples if needed. Make sure you have the graphics files and the grit rule files in the gfx directory in your project directory. Bring up the command line and set your current working directory to the directory which contains the makefile for your project. Type make and if all goes well, you'll have good success. See Figure 5.4, “The program should look like this when run.”. Copy your program to your DS using the method you have chosen.
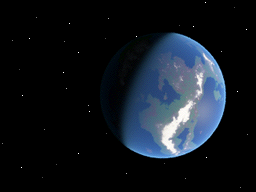
Table of Contents
- Magical Fairies?
- The OAM
- Information About the Sprite Hardware
- How Sprites are Stored in Memory
- Sprite Attributes
- Updating the OAM
- Initializing the OAM
- Rotating Sprites
- Showing and Hiding Sprites
- Moving Sprites
- Setting Sprite Priorities
- Using the Sprites
- Setting up VRAM for Sprites
- Sprite Tile Addressing
- Loading in a Sprite
- What are assertions?
- Displaying the Sprites
- Compiling
No, sprites are not magical fairies. It is a term in 2D graphics programming which refers to an image or animation. The Nintendo DS has dedicated hardware for dealing with sprites. This makes the system very useful for 2D. Most gaming systems do not have a 2D core, and all sprites and other 2D graphics have to be handled manually by painting 2D images on the side of a quad within 3D space.
The OAM manages all the sprites. This is an immense job, most of it done behind the scenes for us. After using it, you might think it magical. It's not as magical as it seems, however. OAM stands for Object Attribute Memory. It is the place in memory we use to keep track of and control our sprites. The OAM works with a SpriteEntry and a SpriteRotation struct to manage the attributes of our sprites.
On the Nintendo DS, we can have up to 128 sprites. Only 32 of those sprites can be affine transformed (rotated, scaled, skewed, etc.). We are also only allowed to address 1024 different tiles to comprise all of our sprites, per engine. Sprites can be made of tiles that use 16 colors or of ones that use 256 colors. Tiles that use 256 colors are twice as large as tiles that use only 16 colors. Another advantage of using 16-color sprites is the ability to use 16 different palettes. When using 256-color sprites, each sprite (and tile) must use the same palette. When using 16-color sprites, we can have one sprite use one 16-color palette and another sprite use a different 16-color palette, even though both use the same tile data. Games often use this trick to make different colored enemies that look the same. The sprites still use the same tile data, but they use different palettes.
Sprites are broken into 8x8 pixel pieces. This is called tiling. When drawn to screen, the hardware pieces these tiles together, like a puzzle where the pieces have no distinguishing edges. There are two ways to tile sprites, 1D and 2D. In a 2D layout, the sprite memory is treated like a giant image from which sprite tiles are obtained by making a box the size of the sprite and placing it over the giant image. In a 1D layout, the sprites are layed out in a linear fashion, as discussed in Figure 6.1, “ The upper text shows information as it would be on a non-tiled background. The lower text shows the same data, tiled, for use in tiled graphic modes. ”.
The conversion process is very similar to that for backgrounds. We simple make grit rule files that tell grit how we want our images converted, and it generates a .o and a header file for us. The grit rule files and image files go into the same place as background images, the gfx> folder.
Figure 6.1. The upper text shows information as it would be on a non-tiled background. The lower text shows the same data, tiled, for use in tiled graphic modes.
const u16 data[] = {
0x0000, 0x0000, 0x0000, 0x0000, 0x0000, 0x0000, 0x0000, 0x0000,
0x0F0F, 0x0F0F, 0x0F0F, 0x0F0F, 0x0F0F, 0x0F0F, 0x0F0F, 0x0F0F,
0x2020, 0x2020, 0x2020, 0x2020, 0x2020, 0x2020, 0x2020, 0x2020,
0x2F2F, 0x2F2F, 0x2F2F, 0x2F2F, 0x2F2F, 0x2F2F, 0x2F2F, 0x2F2F,
0x4040, 0x4040, 0x4040, 0x4040, 0x4040, 0x4040, 0x4040, 0x4040,
0x4F4F, 0x4F4F, 0x4F4F, 0x4F4F, 0x4F4F, 0x4F4F, 0x4F4F, 0x4F4F,
0x6060, 0x6060, 0x6060, 0x6060, 0x6060, 0x6060, 0x6060, 0x6060,
0x6F6F, 0x6F6F, 0x6F6F, 0x6F6F, 0x6F6F, 0x6F6F, 0x6F6F, 0x6F6F,
0x8080, 0x8080, 0x8080, 0x8080, 0x8080, 0x8080, 0x8080, 0x8080,
0x8F8F, 0x8F8F, 0x8F8F, 0x8F8F, 0x8F8F, 0x8F8F, 0x8F8F, 0x8F8F,
0xA0A0, 0xA0A0, 0xA0A0, 0xA0A0, 0xA0A0, 0xA0A0, 0xA0A0, 0xA0A0,
0xAFAF, 0xAFAF, 0xAFAF, 0xAFAF, 0xAFAF, 0xAFAF, 0xAFAF, 0xAFAF,
0xC0C0, 0xC0C0, 0xC0C0, 0xC0C0, 0xC0C0, 0xC0C0, 0xC0C0, 0xC0C0,
0xCFCF, 0xCFCF, 0xCFCF, 0xCFCF, 0xCFCF, 0xCFCF, 0xCFCF, 0xCFCF,
0xE0E0, 0xE0E0, 0xE0E0, 0xE0E0, 0xE0E0, 0xE0E0, 0xE0E0, 0xE0E0,
0xEFEF, 0xEFEF, 0xEFEF, 0xEFEF, 0xEFEF, 0xEFEF, 0xEFEF, 0xEFEF};
const u16 data[] = {
0x0000, 0x0000, 0x0000, 0x0000, 0x0F0F, 0x0F0F, 0x0F0F, 0x0F0F,
0x2020, 0x2020, 0x2020, 0x2020, 0x2F2F, 0x2F2F, 0x2F2F, 0x2F2F,
0x4040, 0x4040, 0x4040, 0x4040, 0x4F4F, 0x4F4F, 0x4F4F, 0x4F4F,
0x6060, 0x6060, 0x6060, 0x6060, 0x6F6F, 0x6F6F, 0x6F6F, 0x6F6F,
0x0000, 0x0000, 0x0000, 0x0000, 0x0F0F, 0x0F0F, 0x0F0F, 0x0F0F,
0x2020, 0x2020, 0x2020, 0x2020, 0x2F2F, 0x2F2F, 0x2F2F, 0x2F2F,
0x4040, 0x4040, 0x4040, 0x4040, 0x4F4F, 0x4F4F, 0x4F4F, 0x4F4F,
0x6060, 0x6060, 0x6060, 0x6060, 0x6F6F, 0x6F6F, 0x6F6F, 0x6F6F,
0x8080, 0x8080, 0x8080, 0x8080, 0x8F8F, 0x8F8F, 0x8F8F, 0x8F8F,
0xA0A0, 0xA0A0, 0xA0A0, 0xA0A0, 0xAFAF, 0xAFAF, 0xAFAF, 0xAFAF,
0xC0C0, 0xC0C0, 0xC0C0, 0xC0C0, 0xCFCF, 0xCFCF, 0xCFCF, 0xCFCF,
0xE0E0, 0xE0E0, 0xE0E0, 0xE0E0, 0xEFEF, 0xEFEF, 0xEFEF, 0xEFEF,
0x8080, 0x8080, 0x8080, 0x8080, 0x8F8F, 0x8F8F, 0x8F8F, 0x8F8F,
0xA0A0, 0xA0A0, 0xA0A0, 0xA0A0, 0xAFAF, 0xAFAF, 0xAFAF, 0xAFAF,
0xC0C0, 0xC0C0, 0xC0C0, 0xC0C0, 0xCFCF, 0xCFCF, 0xCFCF, 0xCFCF,
0xE0E0, 0xE0E0, 0xE0E0, 0xE0E0, 0xEFEF, 0xEFEF, 0xEFEF, 0xEFEF};
Sprites have three attribute variables associated with them. With them, sprites can spin and flip and mosaic and perform all sorts of fun hardware effects. Each attribute is multi-purpose and requires some amount of bit twiddling and masking to achieve the affects we want. That is, it would if it weren't for this nice SpriteEntry union which libnds provides for us. In most cases, we will use this union to do what we'd like to with our sprites, but there are special cases where this is not possible.
We will cover how to update, initialize, and rotate using bit twiddling methods, as libnds doesn't yet provide ways of doing this otherwise. libnds provides the means to do other things that we'll be doing with sprites though, like move them, we'll be doing. We'll use the libnds API wherever possible. Let's write some functions to do each of those, in that order.
I provide you with a header file, located with the acompanying source at code/chapter_6-sprites/include/sprites.h that contains a collection of sprite related function declarations. We'll be working on the definitions for each of these functions together in a new file called sprites.cpp. Our first step will be to create a that new source code file. Put a new file called sprites.cpp into the source folder of your project directory.
Instead of keeping track of things directly in the OAM, we'll manage a copy of the OAM in memory that we will copy over every frame using updateOAM. The reason we do this is because writes to OAM are locked during all times but during vblank. We will wait for vblank to occur before copying our copy of the OAM into the actualy OAM.
Updating the OAM is very straightforward. We do this by copying our copy of the OAM to the real OAM. Our copy of the OAM might still be stuck in the cache and may not have made it into main memory yet, so we first flush local memory (a must whenever performing a DMA operation) to ensure that DMA sees the correct data. The data we want to copy might be stuck in cache still and may not have made it into main memory yet. Then, we tell the OAM to look into the OAMTable instance we will create later for information about each one of our sprites.
void updateOAM(OAMTable * oam) {
    DC_FlushAll();
    dmaCopyHalfWords(SPRITE_DMA_CHANNEL,
                     oam->oamBuffer,
                     OAM,
                     SPRITE_COUNT * sizeof(SpriteEntry));
}
The first thing we do when initializing the OAM is to clear all the sprite data in the OAM. After that, we'll make a call to our afore written updateOAM function.
void iniOAMTable(OAMTable * oam) {
    /*
     * For all 128 sprites on the DS, disable and clear any attributes they
     * might have. This prevents any garbage from being displayed and gives
     * us a clean slate to work with.
     */
    for (int i = 0; i < SPRITE_COUNT; i++) {
        oam->oamBuffer[i].attribute[0] = ATTR0_DISABLED;
        oam->oamBuffer[i].attribute[1] = 0;
        oam->oamBuffer[i].attribute[2] = 0;
    }
    for (int i = 0; i < MATRIX_COUNT; i++) {
        /* If you look carefully, you'll see this is that affine trasformation
         * matrix again. We initialize it to the identity matrix, as we did
         * with backgrounds
         */
        oam->matrixBuffer[i].hdx = 1 << 8;
        oam->matrixBuffer[i].hdy = 0;
        oam->matrixBuffer[i].vdx = 0;
        oam->matrixBuffer[i].vdy = 1 << 8;
    }
    updateOAM(oam);
}
Let's get to spinning. This is a bit more difficult than what we've done before, but still fun. It's nice to not have to make a separate sprite for each rotation position the sprite will be presented in. However, doing so may be necessary for some applications as the Nintendo DS rotation won't always look as pretty as if the rotations had been done elsewhere.
The libnds's sin and cos lookup tables employ a 32768 degree system. Humans usually use a 360 degree system or radians. The angle we'll work with in this function will be one that is part of the 32768 degree system. You'll have to convert your radians or weird 360 degree value (Seriously, why 360? Silly Babylonians.) to the 32768 degree system before using this function in order to see the results you are expecting.
We have to use a transformation derived from our time spent playing with an affine transformation matrix. The sprite's affine transformation matrix is used slightly differently from the background affine transformation matrix. If you have a background in linear algebra, I'd recommend reading up on this portion of the hardware at http://www.coranac.com/tonc/text/affine.htm.
void rotateSprite(SpriteRotation * spriteRotation, int angle) {
    s16 s = sinLerp(angle) >> 4;
    s16 c = cosLerp(angle) >> 4;

    spriteRotation->hdx = c;
    spriteRotation->hdy = s;
    spriteRotation->vdx = -s;
    spriteRotation->vdy = c;
}
Up until now, we haven't used the fancy SpriteEntry union included in libnds. It allows us to avoid thinking about bit twiddling and masking in most cases. In the case of showing and hiding sprites, we still need to be thinking about these bits due to an oddity in the Nintendo DS hardware: the hiding bit of a sprite (bit 9 of sprite attribute 0) is also the double bound bit of a sprite if the sprite is an affine sprite (bit 8 of sprite attribute 0). Follow along with the comments and code as we formulate a solution to writing a function which shows and hides all kinds of sprites.
void setSpriteVisibility(SpriteEntry * spriteEntry, bool hidden, bool affine,
                         bool doubleBound) {
    if (hidden) {
        /*
         * Make the sprite invisible.
         *
         * An affine sprite cannot be hidden. We have to turn it into a
         * non-affine sprite before we can hide it. To hide any sprite, we must
         * set bit 8 and clear bit 9. For non-affine sprites, this is a bit
         * redundant, but it is faster than a branch to just set it regardless
         * of whether or not it is already set.
         */
        spriteEntry->isRotateScale = false; // Bit 9 off
        spriteEntry->isHidden = true; // Bit 8 on
    } else {
        /* Make the sprite visible.*/
        if (affine) {
            /* Again, keep in mind that affine sprites cannot be hidden, so
             * enabling affine is enough to show the sprite again. We also need
             * to allow the user to get the double bound flag in the sprite
             * attribute. If we did not, then our sprite hiding function would
             * not be able to properly hide and restore double bound sprites.
             * We enable bit 9 here because we want an affine sprite.
             */
            spriteEntry->isRotateScale = true;

            /* The double bound flag only acts as the double bound flag when
             * the sprite is an affine sprite. At all other times, it acts as
             * the sprite invisibility flag. We only enable bit 8 here if we want
             * a double bound sprite. */
            spriteEntry->isSizeDouble = doubleBound;
        } else {
            /* Bit 9 (the affine flag) will already be off here, so we don't
             * need to clear it. However, bit 8 (the sprite invisibility flag)
             * will need to be cleared. */
            spriteEntry->isHidden = false;
        }
    }
}
Now for some real fun. Moving sprites in hardware, and not having to worry about clipping, buffers, or anything, is such a wonderful feeling. To move a sprite, we simply change the SpriteEntry properties x and y. This is a case where we don't have to think much about the underlying arrangement of this information. The libnds union SpriteEntry describes the organization of data to the compiler for us and the compiler then figures out the best way to operate on that data; the compiler does the bit twiddling and masking for us. Since this is so simple, we don't even need to write a function to do it for us. So just take note of what we do here and remember it for later; you don't have to write a function for it, but if you want to I'd recommend making it an inline function.
/* This is what we'd do if we wanted to move a sprite. */
spriteEntry->x = 0;
spriteEntry->y = 0;
The ability to set a sprites priorty is essential when dealing with multiple sprites, as we will be doing. As such, we'll now discuss sprite priorities and how to set them.
A sprite, like a background, has a priorty which determines how the sprite will appear with respect to other sprites and to backgrounds. A sprite with the same number priorty as a background will appear above it. A sprite with a lower priorty number than another sprite will appear above that other sprite. There are four priorities per graphics engine available for sprites, similar to background priorities.
To set the sprite priority, we'll simply set the SpriteEntry property priority to one of four different values, depending on which priority we wish to assign: OBJPRIORITY_0, OBJPRIORITY_1, OBJPRIORITY_2, or OBJPRIORITY_3. The following code listing shows an example of what this looks like.
spriteEntry->priority = OBJPRIORITY_3;
Now that our sprites.cpp file is finished, let's get on to how sprites are stored in memory, how to load them, and so forth. So put away your sprites.cpp file into the source directory of your home folder and let's get back into our main.cpp file.
We'll need to make a place for our sprite data to live in VRAM. Since we will be using sprites on the main graphics engine, we can use VRAM bank E for our sprites. VRAM bank E is smaller than the other VRAM banks we've dealt with so far, as it is only 64 KB in size. However, this is more than enough to store 1024 unique 16-color tiles.
In our initVideo, we need to map VRAM bank E for use with sprites on the main graphics engine. Then, we need to tell the main engine to enable sprites of the tiling style we want. We will use 1D tiled sprites. The resulting initVideo function, post-modifications, is presented below .
void initVideo() {
    /*
     *  Map VRAM to display a background on the main and sub screens.
     *
     *  The vramSetMainBanks function takes four arguments, one for each of the
     *  major VRAM banks. We can use it as shorthand for assigning values to
     *  each of the VRAM bank's control registers.
     *
     *  We map banks A and B to main screen  background memory. This gives us
     *  256KB, which is a healthy amount for 16-bit graphics.
     *
     *  We map bank C to sub screen background memory.
     *
     *  We map bank D to LCD. This setting is generally used for when we aren't
     *  using a particular bank.
     *
     *  We map bank E to main screen sprite memory (aka object memory).
     */
    vramSetMainBanks(VRAM_A_MAIN_BG_0x06000000,
                     VRAM_B_MAIN_BG_0x06020000,
                     VRAM_C_SUB_BG_0x06200000,
                     VRAM_D_LCD);

    vramSetBankE(VRAM_E_MAIN_SPRITE);

    /*  Set the video mode on the main screen. */
    videoSetMode(MODE_5_2D | // Set the graphics mode to Mode 5
                 DISPLAY_BG2_ACTIVE | // Enable BG2 for display
                 DISPLAY_BG3_ACTIVE | // Enable BG3 for display
                 DISPLAY_SPR_ACTIVE | // Enable sprites for display
                 DISPLAY_SPR_1D       // Enable 1D tiled sprites
                 );

    /*  Set the video mode on the sub screen. */
    videoSetModeSub(MODE_5_2D | // Set the graphics mode to Mode 5
                    DISPLAY_BG3_ACTIVE); // Enable BG3 for display
}
We'll be using the same memory alignment (boundary) as the GBA uses for our sprites. Tile VRAM addresses must be aligned to 32 bytes. If you feel shorted by this, since you can't use all 1024 addressable tiles when using 256 color tiles, for instance, then you can look up how to use other alignments at http://nocash.emubase.de/gbatek.htm#dsvideoobjs. You'll have to set REG_DISPCNT (via videoSetMode) with a value defined in libnds/include/nds/arm9/video.h akin to DISPLAY_SPR_1D_SIZE_XXX (the default, and the method the GBA and we use, is DISPLAY_SPR_1D_SIZE_32).
To compute the address to copy tiles to, we basically need to know two things: the memory alignment we are using and the tile numbers we want to assign data to. Using the formula from Martin Korth's GBATEK, "TileVramAddress = TileNumber * BoundaryValue", and libnds's SPRITE_GFX define we can compute the address of any tile as follows.
static const int BOUNDARY_VALUE = 32; /* This is the default boundary value
                                       * (can be set in REG_DISPCNT) */
static const int OFFSET_MULTIPLIER = BOUNDARY_VALUE /
                                     sizeof(SPRITE_GFX[0]);
uint16 * tileVramAddress = &SPRITE_GFX[shuttle->gfxIndex *
                                           OFFSET_MULTIPLIER];
We usually want to copy more than one tile into vram at a time, however. Luckily, when converting images to sprites with grit, it will tell us the length in bytes of our tile data for that sprite. After we have the length in bytes, we can use dmaCopyHalfwords (which uses byte lengths for copying) to copy the tile data into VRAM. We can also calculate how many tiles an image uses from its length in bytes by diving the length in bytes by how many bytes a tile takes up. In our case, as we'll be using 16-color tiles, a tile (8x8 pixels) takes up 32 bytes.
Now, to see a sprite in action. Let's load in the orangeShuttle graphic and the moon graphic. Make a new function called initSprites. Place it after the initBackgrounds function. Make sure to include orangeShuttle.h and moon.h now. They contain information about our sprites as generated by grit.
I've also create a new struct type called "SpriteInfo". This struct contains information about sprites that aren't explicitly contained in the SpriteEntry struct. We'll be using it to help us manage our information about sprites better.
Procedure 6.1. To Create a Sprite
We'll begin by filling in our SpriteInfo struct for the sprite. Each sprite will have its own SpriteInfo struct. The first thing we need to do is assign an OAM ID to the sprite. This number will help us keep track of which OAM entry our sprite is associated with. We'll also use it to compute other offsets, although we don't have to use it for that purpose in many cases.
Assign the width, height, and angle of the sprite.
Select an OAM entry to associate with this sprite.
Configure attribute 0.
Configure attribute 1.
Configure attribute 2.
Copy tile data to VRAM.
Copy the palette data to VRAM.
We'll just follow these steps twice when writing the initSprites function for our sprites. You can follow along with the comments and the code below.
void initSprites(OAMTable * oam, SpriteInfo *spriteInfo) {
    /*  Define some sprite configuration specific constants.
     *
     *  We will use these to compute the proper index into memory for certain
     *  tiles or palettes.
     *
     *  OFFSET_MULTIPLIER is calculated based on the following formula from
     *  GBATEK (http://nocash.emubase.de/gbatek.htm#dsvideoobjs):
     *      TileVramAddress = TileNumber * BoundaryValue
     *  Since SPRITE_GFX is a uint16*, the compiler will increment the address
     *  it points to by 2 for each change in 1 of the array index into
     *  SPRITE_GFX. (The compiler does pointer arithmetic.)
     */
    static const int BYTES_PER_16_COLOR_TILE = 32;
    static const int COLORS_PER_PALETTE = 16;
    static const int BOUNDARY_VALUE = 32; /* This is the default boundary value
                                           * (can be set in REG_DISPCNT) */
    static const int OFFSET_MULTIPLIER = BOUNDARY_VALUE /
                                         sizeof(SPRITE_GFX[0]);

    /* Keep track of the available tiles */
    int nextAvailableTileIdx = 0;

    /* Create the ship sprite. */
    static const int SHUTTLE_OAM_ID = 0;
    assert(SHUTTLE_OAM_ID < SPRITE_COUNT);
    SpriteInfo * shuttleInfo = &spriteInfo[SHUTTLE_OAM_ID];
    SpriteEntry * shuttle = &oam->oamBuffer[SHUTTLE_OAM_ID];

    /* Initialize shuttleInfo */
    shuttleInfo->oamId = SHUTTLE_OAM_ID;
    shuttleInfo->width = 64;
    shuttleInfo->height = 64;
    shuttleInfo->angle = 462;
    shuttleInfo->entry = shuttle;

    /*
     *  Configure attribute 0.
     *
     *  OBJCOLOR_16 will make a 16-color sprite. We specify that we want an
     *  affine sprite (via isRotateScale) here because we would like to rotate
     *  the ship.
     */
    shuttle->y = SCREEN_HEIGHT / 2 - shuttleInfo->height;
    shuttle->isRotateScale = true;
    /* This assert is a check to see a matrix is available to store the affine
     * transformation matrix for this sprite. Of course, you don't have to have
     * the matrix id match the affine id, but if you do make them match, this
     * assert can be helpful. */
    assert(!shuttle->isRotateScale || (shuttleInfo->oamId < MATRIX_COUNT));
    shuttle->isSizeDouble = false;
    shuttle->objMode = OBJMODE_NORMAL;
    shuttle->isMosaic = false;
    shuttle->colMode = OBJCOLOR_16;
    shuttle->objShape = OBJSHAPE_SQUARE;

    /*
     *  Configure attribute 1.
     *
     *  rotationIndex refers to the loation of affine transformation matrix. We
     *  set it to a location computed with a macro. OBJSIZE_64, in our case
     *  since we are making a square sprite, creates a 64x64 sprite.
     */
    shuttle->x = SCREEN_WIDTH / 2 - shuttleInfo->width * 2 +
                    shuttleInfo->width / 2;
    shuttle->rotationIndexx = shuttleInfo->oamId;
    shuttle->objSize = OBJSIZE_64;

    /*
     *  Configure attribute 2.
     *
     *  Configure which tiles the sprite will use, which priority layer it will
     *  be placed onto, which palette the sprite should use, and whether or not
     *  to show the sprite.
     */
    shuttle->gfxIndex = nextAvailableTileIdx;
    nextAvailableTileIdx += orangeShuttleTilesLen / BYTES_PER_16_COLOR_TILE;
    shuttle->priority = OBJPRIORITY_0;
    shuttle->palette = shuttleInfo->oamId;

    /* Rotate the sprite */
    rotateSprite(&oam->matrixBuffer[shuttleInfo->oamId],
                 shuttleInfo->angle);

    /*************************************************************************/

    /* Create the moon sprite. */
    static const int MOON_OAM_ID = 1;
    assert(MOON_OAM_ID < SPRITE_COUNT);
    SpriteInfo * moonInfo = &spriteInfo[MOON_OAM_ID];
    SpriteEntry * moon = &oam->oamBuffer[MOON_OAM_ID];

    /* Initialize moonInfo */
    moonInfo->oamId = MOON_OAM_ID;
    moonInfo->width = 32;
    moonInfo->height = 32;
    moonInfo->angle = 462;
    moonInfo->entry = moon;

    /*
     *  Configure attribute 0.
     *
     *  OBJCOLOR_16 will make a 16-color sprite. We won't specify that we want
     *  an affine sprite here because we don't want one this time.
     */
    moon->y = SCREEN_WIDTH / 2 + moonInfo->height / 2;
    moon->isRotateScale = false;
    /* This assert is a check to see a matrix is available to store the affine
     * transformation matrix for this sprite. Of course, you don't have to have
     * the matrix id match the affine id, but if you do make them match, this
     * assert can be helpful. */
    assert(!moon->isRotateScale || (moonInfo->oamId < MATRIX_COUNT));
    moon->isHidden = false;
    moon->objMode = OBJMODE_NORMAL;
    moon->isMosaic = false;
    moon->colMode = OBJCOLOR_16;
    moon->objShape = OBJSHAPE_SQUARE;

    /*
     * Configure attribute 1.
     *
     * OBJSIZE_32 will create a sprite of size 32x32, since we are making a
     * square sprite. Since we are using a non-affine sprite, attribute 1
     * doesn't have an rotationIndexx anymore. Instead, it has the ability to
     * flip the sprite vertically or horizontally.
     */
    moon->x = SCREEN_WIDTH / 2 + moonInfo->width + moonInfo->width / 2;
    moon->hFlip = false;
    moon->vFlip = false;
    moon->objSize = OBJSIZE_32;

    /*
     *  Configure attribute 2.
     *
     *  Configure which tiles the sprite will use, which priority layer it will
     *  be placed onto, which palette the sprite should use, and whether or not
     *  to show the sprite.
     */
    moon->gfxIndex = nextAvailableTileIdx;
    nextAvailableTileIdx += moonTilesLen / BYTES_PER_16_COLOR_TILE;
    moon->priority = OBJPRIORITY_2;
    moon->palette = moonInfo->oamId;

    /*************************************************************************/

    /* Copy over the sprite palettes */
    dmaCopyHalfWords(SPRITE_DMA_CHANNEL,
                     orangeShuttlePal,
                     &SPRITE_PALETTE[shuttleInfo->oamId *
                                     COLORS_PER_PALETTE],
                     orangeShuttlePalLen);
    dmaCopyHalfWords(SPRITE_DMA_CHANNEL,
                     moonPal,
                     &SPRITE_PALETTE[moonInfo->oamId * COLORS_PER_PALETTE],
                     moonPalLen);

    /* Copy the sprite graphics to sprite graphics memory */
    dmaCopyHalfWords(SPRITE_DMA_CHANNEL,
                     orangeShuttleTiles,
                     &SPRITE_GFX[shuttle->gfxIndex * OFFSET_MULTIPLIER],
                     orangeShuttleTilesLen);
    dmaCopyHalfWords(SPRITE_DMA_CHANNEL,
                     moonTiles,
                     &SPRITE_GFX[moon->gfxIndex * OFFSET_MULTIPLIER],
                     moonTilesLen);
}
In the above code, you'll find some things that look like function calls to a function called assert. These aren't actually function calls, but macro expansions. You'll have to include assert.h in order to use them.
#include <assert.h>
The assert macro allows the programmer to make assumptions about what is going on in the code. To use them, you just place some kind of "fact" in between the paranthesis. Whenever this assumption fails, the program will quit. Assertions are evaluated at runtime.
Assertions help you avoid bugs developing obscure later on since they'll stop them right where something first goes wrong. Assertions are a good thing and should be used often.
When you release a production version of your software, the assertions can be removed from your code by the preprocessor. To do this with a GNU compiler, like the ones we are using, you simply set NDEBUG.
In our main function, we now need to initialize our copy of the OAM, create the structs which hold our sprite data, make a call to the initSprites function we just created, and then update the OAM by copying our OAM copy to OAM.
int main() {
    /*  Turn on the 2D graphics core. */
    powerOn(POWER_ALL_2D);

    /*
     *  Configure the VRAM and background control registers.
     *
     *  Place the main screen on the bottom physical screen. Then arrange the
     *  VRAM banks. Next, confiure the background control registers.
     */
    lcdMainOnBottom();
    initVideo();
    initBackgrounds();

    /* Set up a few sprites. */
    SpriteInfo spriteInfo[SPRITE_COUNT];
    OAMTable *oam = new OAMTable();
    iniOAMTable(oam);
    initSprites(oam, spriteInfo);

    /* Display the backgrounds. */
    displayStarField();
    displayPlanet();
    displaySplash();

    /*
     *  Update the OAM.
     *
     *  We have to copy our copy of OAM data into the actual
     *  OAM during VBlank (writes to it are locked during
     *  other times).
     */
    swiWaitForVBlank();
    updateOAM(oam);

    return 0;
}
Before you get to compiling, you may want to look at the top of your main.cpp file and verify that you are including all the proper files. There are a lot of files to include now, so it is easy to lose track of which ones we need. (I probably even forgot to let you know about some of them.)
#include <nds.h>
#include <assert.h>
#include "sprites.h"

/* Backgrounds */
#include "starField.h"
#include "planet.h"
#include "splash.h"
/* Sprites */
#include "orangeShuttle.h"
#include "moon.h"
If all goes well, you’ll compile with no problems and the output will look as in Figure 6.2, “Output with both backgrounds and a sprite.”.
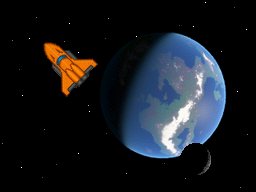
Table of Contents
Object oriented programming (OOP) is essential to making good games on a modern system. Although it is very much possible without object oriented programming, OOP is an incredible tool that greatly improves code reusability, readability, modularization, and abstraction. It makes the programmer's job a lot easier. Also, due to modularization, collaborating on projects with your friends or coworkers is easily ten fold easier.
The first thing we'll make is a Ship class. This class will encapsulate all the properties and functionality of any ship in an easy to use and understand format. Think of things a ship can do, on a high level. What should come to mind is the ability to turn both ways, shoot weapons, accelerate, move at a given velocity (coasting), and maybe some more things if you are creative enough. What properties of a ship can you come up with? Perhaps turning speed, thrust, mass, maximum speed, velocity, position, shields? Well, after you are done brainstorming, the next step is to write out the functionality and properties we need to put into our Ship class. You could make a table, as in Table 7.1, “Table of Ship properties and functionality.”, or draw some diagrams on a piece of paper. Either way, you want to make sure your ideas all get onto some physical paper before you begin coding.
I have provided a skeleton framework file for you to write your class in. It is all set and ready for you to implement in the ship.cpp file. The header file, ship.h is also included. On your own, with your own classes in the future, you should always make a skeleton framework class to work from. It makes implementation straightforward and you do not have to worry about the semantics of setting up a class so much.
I have provided you with a simple constructor and private initialization method method. These are often mundane things to make. In fact, the compiler will automatically make the constructor, copy constructor, and operator= methods for you if you don't explicitly make them. Feel free to modify the default values in the initializers to try out different effects of changing the ship properties.
Acceleration is probably one of the most important things your ships can do. To accelerate, we simply increase our velocity by a certain increment, that being the thrust capability of the ship, in the angle we are headed. Here is where some simple trigonometry comes into play. Since our velocity is stored as a two dimensional vecotr (x and y component), we have to shadow our thrust vector onto each direction. We do this we multiply the thrust by sin(angle) for our x component, and by -cos(angle) for the y direction. Next, after we have computed the increment for both x and y, we add them onto our current velocity, making sure we don’t go over the ship's maximum speed.
void Ship::accelerate() {
    float incX = thrust * sin(angle);
    float incY = -(thrust * cos(angle));

    //the following method of speed limitation is not accurate, traveling
    //diagonally is faster than straight, which is not the desired limitation
    //a more accurate method is needed at a later time

    velocity.x += incX;
    //make sure can't go too fast in x direction
    if (velocity.x > maxSpeed) {
        velocity.x = maxSpeed;
    }
    if (velocity.x < -maxSpeed) {
        velocity.x = -maxSpeed;
    }

    velocity.y += incY;
    //make sure can't go too fast in y direction
    if (velocity.y > maxSpeed) {
        velocity.y = maxSpeed;
    }
    if (velocity.y < -maxSpeed) {
        velocity.y = -maxSpeed;
    }
}
This one is incredibly easy thanks to the Nintendo DS hardware. All we have to do is increment our position by our velocity. The hardware takes care of any wrapping or offscreen issues.
void Ship::moveShip() {
    //move the ship
    position.x += velocity.x;
    position.y += velocity.y;

    //hw does wrap around for us, so we don't have to have any of that sort of
    //logic in here
}
This one took me a while to figure out, even though it's just one line, but it's very useful. We can turn the ship around, not a 180 per se, but simply pointing into the opposite direction of our current velocity. This will get the angle of our velocity with respect to 0 degrees, and then will do a 180 from that angle.
void Ship::reverseTurn() {
    angle = (2 * PI) - atan2(velocity.x, velocity.y);
}
Rotating the ship is also quite simple. We just increment or by ship’s turning speed depending on which direction we wish to turn.
void Ship::turnClockwise() {
      angle += turnSpeed;
}
void Ship::turnCounterClockwise() {
      angle -= turnSpeed;
}
Return the ship’s position.
MathVector2D<float> Ship::getPosition() {
      return position;
}
This one is a bit more tricky and involved. I suppose I should start by explaining that a Nintendo DS circle has 32768 degrees. It doesn't actually have 32768 degrees, nor does a Nintendo DS even know what a circle is, but it is easy to understand the hardware a bit better when we think of it this way. I will say, however, that the reason for the 32768 degrees is due to libnds's built-in look up tables for the sin and cos functions. Having only 360 entries in your lookup table would be a waste of space when it takes just as many bits to index into a 360 entry table as it does a 512 entry one. libnds gives us more accuracy by presenting a 32768 entry one. More entries allow finer accuracy. In order for the Nintendo DS to know how to rotate our sprites, we have to convert the internally stored radian angle value to a value within the 32768 degree system. This is an easy conversion.
The first step is to convert to a 360 degree system, as you must have learned in junior high school. This is done by multiplying the radian value by 180/PI. The 180 part is half the number of degrees in a circle. So, in a 32768 degree system we can convert by multiplying the radian value by DEGREES_IN_A_CIRCLE/(2 * PI). Lastly, just return that value as an integer. (The hardware does not have any floating point, so when rotating our sprites, we use a fixed point value disguised as an ordinary integer.)
Then, we make a function to return a converted angle value, for whenever we need it.
int Ship::radToDeg(float rad) {
      return (int)(rad * (DEGREES_IN_A_CIRCLE/(2 * PI)));
}
int Ship::getAngleDeg() {
      return radToDeg(angle);
}
We now need to create an instance of the ship in our main function. Creating an instance of a class, known as an object, is quite simple, as you can see below. We just have to create the Ship object and then assign a SpriteEntry to it.
We should also do something nifty with our new class so that we can verify that what we wrote is working. Let's make the ship move around on its own by telling the ship to trust ten times.
int main() {
    /*  Turn on the 2D graphics core. */
    powerOn(POWER_ALL_2D);

    /*
     *  Configure the VRAM and background control registers.
     *
     *  Place the main screen on the bottom physical screen. Then arrange the
     *  VRAM banks. Next, confiure the background control registers.
     */
    lcdMainOnBottom();
    initVideo();
    initBackgrounds();

    /* Set up a few sprites. */
    SpriteInfo spriteInfo[SPRITE_COUNT];
    OAMTable *oam = new OAMTable();
    iniOAMTable(oam);
    initSprites(oam, spriteInfo);

    /* Display the backgrounds. */
    displayStarField();
    displayPlanet();
    displaySplash();

    /* Make the ship object */
    static const int SHUTTLE_OAM_ID = 0;
    SpriteEntry * shipEntry = &oam->oamBuffer[SHUTTLE_OAM_ID];
    SpriteRotation * shipRotation = &oam->matrixBuffer[SHUTTLE_OAM_ID];
    Ship * ship = new Ship(&spriteInfo[SHUTTLE_OAM_ID]);

    /* Accelerate the ship for a little while to make it move. */
    for (int i = 0; i < 10; i++) {
        ship->accelerate();
    }

    /*
     *  Update the OAM.
     *
     *  We have to copy our copy of OAM data into the actual
     *  OAM during VBlank (writes to it are locked during
     *  other times).
     */
    swiWaitForVBlank();
    updateOAM(oam);

    return 0;
}
The previous code isn't very exciting, since we never update the OAM more than once. We need to begin the creation of what is referred to as the game loop. We won't be fully implementing it in this chapter, since a major component of it will be missing until we discover input on the Nintendo DS.
The game loop has at least three major components. The first thing any game loop should do is to collect input from the outside world. We won't be doing that in this chapter, however. The next component of the game loop is updating the game state. Based on inputs the game received in the previous frame (to the one we'll render next) and the passing of time, the game state will change (if anything interesting is happening). The final component of the game loop is the rendering component. In our case, we have to update the OAM to let it know of the changes that occured in the game state and that it needs to reflect those changes.
Now that we know what a game loop is, it's time for us to start creating one to run our program. The first thing we want to happen in our game loop is for the game state to be updated. This is because we don't have any input to collect yet. We tell our ship to move at it's current velocity. This will change the ship’s position. Then we update the sprite attributes with new information about our ship, as some properties of the ship have now changed (i.e. its position). Finally, we call a function that will make sure our program does not exceed 60fps (speed of the graphics on the Nintendo DS) by waiting for vblank, and then we update the OAM, telling it that we changed some attributes on the sprites and it needs to handle that.
    for (;;) {
        /* Update the game state. */
        ship->moveShip();

        /* Update sprite attributes. */
        MathVector2D<float> position = ship->getPosition();
        shipEntry->x = (int)position.x;
        shipEntry->y = (int)position.y;
        rotateSprite(shipRotation, ship->getAngleDeg());

        /*
         *  Update the OAM.
         *
         *  We have to copy our copy of OAM data into the actual OAM during
         *  VBlank (writes to it are locked during other times).
         */
        swiWaitForVBlank();
        updateOAM(oam);
    }

    return 0;
}
The OAM really shines through here. The all powerful Nintendo DS hardware, an incredible masterpiece, will rotate and move our ship with very little effort on our part. In hindsight, all we have done is flip a few bits in a few registers in a structured manner, and our ship comes to life. Incredible.
Verify that you are including all the files you need to include now, before compiling.
#include <nds.h>
#include <assert.h>
#include "sprites.h"
#include "ship.h"

/* Backgrounds */
#include "starField.h"
#include "planet.h"
#include "splash.h"
/* Sprites */
#include "orangeShuttle.h"
#include "moon.h"
Everything should compile for you fine at this point if you wish to play around with your new class. However, in the next chapter we will cover how to get Nintendo DS input to affect the Ship. Be ready for it, we're going to have some major fun.
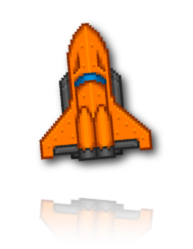
Table of Contents
The Nintendo DS has many different user input systems, including buttons, touch screen, and a microphone. Most video game systems only have buttons and an analog stick or two. While the Nintendo DS does not have an analog stick, it does have an amazing touch screen which has millions of different creative uses. We will only cover the touch screen and buttons, though. If you wish to learn more about the microphone, I'd recommend reading, although a bit outdated, the only microphone resource I know of http://www.double.co.nz/nintendo_ds/nds_develop9.html.
libnds provides us with a very nice abstraction for key input. Instead of having to AND registers with cryptic masks to discover which keys we are pressing, we simply call scanKeys, then check one of three input functions, keysDown(), keysHeld, or keysUp. In order to see which keys have been recently pressed, use keysDown. To see which keys are currently held, use keysHeld. To see which keys have just been released, use keysUp. libnds provides us with defines for some key masks as well. How they are set up is explained in Table 8.1, “libnds Key Defines”.
Table 8.1. libnds Key Defines
| Key Define | Mask Bit | Associated Input |
|---|---|---|
| KEY_A | 1 << 0 | A Button |
| KEY_B | 1 << 1 | B Button |
| KEY_SELECT | 1 << 2 | Select Button |
| KEY_START | 1 << 3 | Start Button |
| KEY_RIGHT | 1 << 4 | Right D-pad |
| KEY_LEFT | 1 << 5 | Left D-pad |
| KEY_UP | 1 << 6 | Up D-pad |
| KEY_DOWN | 1 << 7 | Down D-pad |
| KEY_R | 1 << 8 | R Button |
| KEY_L | 1 << 9 | L Button |
| KEY_X | 1 << 10 | X Button |
| KEY_Y | 1 << 11 | Y Button |
| KEY_TOUCH | 1 << 12 | Pen Touching Screen (no coordinates) |
| KEY_LID | 1 << 13 | Lid shutting (useful for sleeping) |
Utada Hikaru wants to touch it. You have to code it. Let's go!
The touch screen a big part of what makes the Nintendo DS awesome. The libnds API for using it is cake easy too. We'll be ready for Utada Hikaru in no time. Whenever you want to read the current touch location, simply call the function touchRead. This function assigns values to a struct that contains the x and y coordinate of the touch. You use it like so.
/* To read from the touch screen, we can do this stuff. */
touchPosition touch;
touchRead(&touch);
touch->px; // This contains the x pixel location.
touch->py; // This contains the y pixel location.
What is the IPC?
You may see code that uses something called the IPC to interact with the touch screen. Use of the IPC struct is deprecated. This means that you shouldn't use it and should not depend on it being there in the future. The method we use to read values from the touch screen does not use the IPC struct and is safe for future use.
Now that we know a bit about how input is laid out on the Nintendo DS, let's write a function in our main.cpp to collect the input for us. We'll call it updateInput. We'll use this function as the first thing we call in our complete game loop.
void updateInput(touchPosition * touch) {
    // Update the key registers with current values.
    scanKeys();

    // Update the touch screen values.
    *touch = touchRead();
}
This function will be part of our game state updating game loop component. It will react to outside input and modify the game state accordingly. As such, it will have to know about and be able to modify the game state. We'll pass the game state to it as function parameters. Let's call the function handleInput.
First, we want the ship to accelerate when we press up. To do this, we detect when the Nintendo DS has the up key on the D-pad held (which included the initial down press) and accelerate the ship if so. The up key will constantly read as held, so long as it is held. Reading the input does not affect the keys register. We'll do similar things for each of the other keys. See if you can tell what each key does from the code listing below.
void handleInput(Ship * ship, MathVector2D<int> * moonPos,
                 SpriteInfo * moonInfo, touchPosition * touch) {

    /* Handle up and down parts of D-Pad. */
    if (keysHeld() & KEY_UP) {
        //accelerate ship
        ship->accelerate();
    } else if (keysHeld() & KEY_DOWN) {
        //reverse ship direction
        ship->reverseTurn();
    }

    /* Handle left and right parts of D-Pad. */
    if (keysHeld() & KEY_LEFT) {
        //rotate counter clockwise
        ship->turnCounterClockwise();
    } else if (keysHeld() & KEY_RIGHT) {
        //rotate clockwise
        ship->turnClockwise();
    }

    /*
     *  Handle the touch screen.
     *
     *  This is basically some fancy pants junk to enable grabbing and moving
     *  of the moon. It isn't essential to know how this code works to
     *  understand how to reach values from the touch screen, but it was cool
     *  enough that I wanted to put it in the case study.
    */
    static MathVector2D<int> moonGrip;
    if (keysDown() & KEY_TOUCH) {
        /* Record the grip */
        moonGrip.x = touch->px;
        moonGrip.y = touch->py;
    } else if (keysHeld() & KEY_TOUCH) {
        int newX = moonPos->x + touch->px - moonGrip.x;
        int newY = moonPos->y + touch->py - moonGrip.y;

        /* Prevent dragging off the screen */
        if (newX < 0) {
            moonPos->x = 0;
        } else if (newX > (SCREEN_WIDTH - moonInfo->width)) {
            moonPos->x = SCREEN_WIDTH - moonInfo->width;
        } else {
            moonPos->x = newX;
        }
        if (newY < 0) {
            moonPos->y = 0;
        } else if (newY > (SCREEN_HEIGHT - moonInfo->height)) {
            moonPos->y = SCREEN_HEIGHT - moonInfo->height;
        } else {
            moonPos->y = newY;
        }

        /* Record the grip again. */
        moonGrip.x = touch->px;
        moonGrip.y = touch->py;
    }
}
As you've noticed, having that Ship class made input handling extremely easy. Our keys will directly affect various properties of the ship as we press them. This is really amazing, but the true miracle is yet to come.
As for the moon, since we didn't make one class for it, the code came together a little more messily. We also had to pass two parameters to the handleInput function to represent the moon portion of the game state instead of one. If we had wanted to be more clean, we could have even produced a game state struct that contained all the game state and all operations on it in one place.
Let's check back in on our main function now. We need to make some adjustments to our game loop since we've now added the ability to collect input and to react to input. The first thing we now want to happen in our game loop is for the key registers and read touch screen coordinates to get updated. We make a call to updateInput and it all happens for us. Next, we handle the input we just received by calling our recently created handleInput function, passing in our game state so that it can change it for us. Everything else is as before.
int main() {
    /*  Turn on the 2D graphics core. */
    powerOn(POWER_ALL_2D);

    /*
     *  Configure the VRAM and background control registers.
     *
     *  Place the main screen on the bottom physical screen. Then arrange the
     *  VRAM banks. Next, confiure the background control registers.
     */
    lcdMainOnBottom();
    initVideo();
    initBackgrounds();

    /* Set up a few sprites. */
    SpriteInfo spriteInfo[SPRITE_COUNT];
    OAMTable *oam = new OAMTable();
    iniOAMTable(oam);
    initSprites(oam, spriteInfo);

    /* Display the backgrounds. */
    displayStarField();
    displayPlanet();
    displaySplash();

    /*************************************************************************/

    /* Keep track of the touch screen coordinates */
    touchPosition touch;

    /* Make the ship object */
    static const int SHUTTLE_AFFINE_ID = 0;
    SpriteEntry * shipEntry = &oam->oamBuffer[SHUTTLE_AFFINE_ID];
    SpriteRotation * shipRotation = &oam->matrixBuffer[SHUTTLE_AFFINE_ID];
    Ship * ship = new Ship(&spriteInfo[SHUTTLE_AFFINE_ID]);

    /* Make the moon */
    static const int MOON_AFFINE_ID = 1;
    SpriteEntry * moonEntry = &oam->oamBuffer[MOON_AFFINE_ID];
    SpriteInfo * moonInfo = &spriteInfo[MOON_AFFINE_ID];
    MathVector2D<int> * moonPos = new MathVector2D<int>();
    moonPos->x = moonEntry->x;
    moonPos->y = moonEntry->y;

    for (;;) {
        /* Update the game state. */
        updateInput(&touch);
        handleInput(ship, moonPos, moonInfo, &touch);
        ship->moveShip();

        /* Update ship sprite attributes. */
        MathVector2D<float> position = ship->getPosition();
        shipEntry->x = (int)position.x;
        shipEntry->y = (int)position.y;
        rotateSprite(shipRotation, ship->getAngleDeg());
        /* Update moon sprite attributes. */
        moonEntry->x = (int)moonPos->x;
        moonEntry->y = (int)moonPos->y;

        /*
         *  Update the OAM.
         *
         *  We have to copy our copy of OAM data into the actual OAM during
         *  VBlank (writes to it are locked during other times).
         */
        swiWaitForVBlank();
        updateOAM(oam);
    }

    return 0;
}
Again, we should double check that we have all the proper includes before compiling.
#include <nds.h>
#include <assert.h>
#include "sprites.h"
#include "ship.h"

/* Backgrounds */
#include "starField.h"
#include "planet.h"
#include "splash.h"
/* Sprites */
#include "orangeShuttle.h"
#include "moon.h"
Now we can control our ship with the D-Pad. What fun! The game should now appear as in Figure 8.1, “Flying around in the Orange Shuttle.”. Now if only we had some aliens to kill…
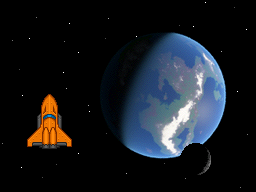
Table of Contents
Sounds are essential in any game. Our little project should be no exception. Sounds bring life to various elements in the game, such as space ships, weapon systems, rain, sword clashing, car engines, and so forth.
Many games don't need music. For instance, a game with the programmer's or game designer's favorite song may annoy many players who have different tastes in music. Instead, give the player the option to listen to their own music, on their own audio equipment. Not to mention, music can be costly in data size.
Sound effects on the other hand, are quite useful. A word of warning, however, a game with bad sounds (scratchy, annoying, too repetitive, etc.) is worse than a silent game. Take care when engineering sounds for your game.
The Nintendo DS has amazing sound hardware. We will only be able to scratch the surface of it, and even still, we won't leave any scratch marks. The Nintendo DS has 16 channels to play sounds, numbered 0 through 15. Channels 8-15 are special channels. All channels can play ADPCM or PCM sounds, while 8-13 are the only channels that can play PSG sounds and 14-15 the only that can generate noise. We will only be experimenting with PCM sounds.
To play our sounds, we will use the unbelievebly impressive homebrew audtio library, maxmod. maxmod is distributed with libnds, so you should already have it installed. maxmod can play music as well as sound effects, in such formats as mod, it, s3m, xm, and wav, but we'll just be using it as a wav player to play our sound effects. For more information and deeper coverage of the library, visit http://maxmod.org/.
The makefile I've included with my manual has a custom rule for creating a soundbank.bin file from all audio files in the audio project folder. The rule runs mmutil to create the soundbank.bin and soundbank.h files. The bin2o rule turns the .bin file into something safe to link into your nds file and creates the soundbank_bin.h file. All of these header files will be located in the build folder after a build, if you wish to review their contents.
Now it's finally time for some code. maxmod simplifies sound playing quite a bit. All we need to do is initialize the library, let it know where our soundbank is, load the sound from our soundbank, and call a function to play the sound. It will serve our purposes for now, as a springboard into more advanced forms of sound. Enough with the chatter, here's some code for our main.cpp.
void handleInput(Ship * ship,
                 MathVector2D<int> * moonPos,
                 SpriteInfo * moonInfo,
                 touchPosition * touch) {

    /* Handle up and down parts of D-Pad. */
    if (keysDown() & KEY_UP) {
        // Play our sound only when the button is initially pressed
        mmEffect(SFX_THRUST);
    }
    if (keysHeld() & KEY_UP) {
        //accelerate ship
        ship->accelerate();
    } else if (keysHeld() & KEY_DOWN) {
        //reverse ship direction
        ship->reverseTurn();
    }

    /* Handle left and right parts of D-Pad. */
    if (keysHeld() & KEY_LEFT) {
        //rotate counter clockwise
        ship->turnCounterClockwise();
    } else if (keysHeld() & KEY_RIGHT) {
        //rotate clockwise
        ship->turnClockwise();
    }

    /* Handle the touch screen. */
    static MathVector2D<int> moonGrip;
    if (keysDown() & KEY_TOUCH) {
        /* Record the grip */
        moonGrip.x = touch->px;
        moonGrip.y = touch->py;
    } else if (keysHeld() & KEY_TOUCH) {
        int newX = moonPos->x + touch->px - moonGrip.x;
        int newY = moonPos->y + touch->py - moonGrip.y;

        /* Prevent dragging off the screen */
        if (newX < 0) {
            moonPos->x = 0;
        } else if (newX > (SCREEN_WIDTH - moonInfo->width)) {
            moonPos->x = SCREEN_WIDTH - moonInfo->width;
        } else {
            moonPos->x = newX;
        }
        if (newY < 0) {
            moonPos->y = 0;
        } else if (newY > (SCREEN_HEIGHT - moonInfo->height)) {
            moonPos->y = SCREEN_HEIGHT - moonInfo->height;
        } else {
            moonPos->y = newY;
        }

        /* Record the grip again. */
        moonGrip.x = touch->px;
        moonGrip.y = touch->py;
    }
}

int main() {
    /*  Turn on the 2D graphics core. */
    powerOn(POWER_ALL_2D);

    /*
     *  Configure the VRAM and background control registers.
     *
     *  Place the main screen on the bottom physical screen. Then arrange the
     *  VRAM banks. Next, confiure the background control registers.
     */
    lcdMainOnBottom();
    initVideo();
    initBackgrounds();

    /* Initialize maxmod using the memory based soundbank set up. */
    mmInitDefaultMem((mm_addr)soundbank_bin);

    /* Set up a few sprites. */
    SpriteInfo spriteInfo[SPRITE_COUNT];
    OAMTable *oam = new OAMTable();
    iniOAMTable(oam);
    initSprites(oam, spriteInfo);

    /* Display the backgrounds. */
    displayStarField();
    displayPlanet();
    displaySplash();

    /*************************************************************************/

    /* Keep track of the touch screen coordinates */
    touchPosition touch;

    /* Make the ship object */
    static const int SHUTTLE_AFFINE_ID = 0;
    SpriteEntry * shipEntry = &oam->oamBuffer[SHUTTLE_AFFINE_ID];
    SpriteRotation * shipRotation = &oam->matrixBuffer[SHUTTLE_AFFINE_ID];
    Ship * ship = new Ship(&spriteInfo[SHUTTLE_AFFINE_ID]);

    /* Make the moon */
    static const int MOON_AFFINE_ID = 1;
    SpriteEntry * moonEntry = &oam->oamBuffer[MOON_AFFINE_ID];
    SpriteInfo * moonInfo = &spriteInfo[MOON_AFFINE_ID];
    MathVector2D<int> * moonPos = new MathVector2D<int>();
    moonPos->x = moonEntry->x;
    moonPos->y = moonEntry->y;

    /*  Set up sound data.*/
	mmLoadEffect(SFX_THRUST);

    for (;;) {
        /* Update the game state. */
        updateInput(&touch);
        handleInput(ship, moonPos, moonInfo,&touch);
        ship->moveShip();

        /* Update ship sprite attributes. */
        MathVector2D<float> position = ship->getPosition();
        shipEntry->x = (int)position.x;
        shipEntry->y = (int)position.y;
        rotateSprite(shipRotation, ship->getAngleDeg());
        /* Update moon sprite attributes. */
        moonEntry->x = (int)moonPos->x;
        moonEntry->y = (int)moonPos->y;

        /*
         *  Update the OAM.
         *
         *  We have to copy our copy of OAM data into the actual OAM during
         *  VBlank (writes to it are locked during other times).
         */
        swiWaitForVBlank();
        updateOAM(oam);
    }

    return 0;
}
In summary, we simply set up our sound in the main function, and had the handleInput function play our sound whenever the up key is initially pressed.
We are barely touching what maxmod can do in this case study. maxmod can stop sounds after they've started playing, loop sounds, play music, and more without breaking a sweat (because the Nintendo DS doesn't have sweat glands anyway). I highly recommend you read about it on its homepage, or at least run the maxmod demo (featured on said homepage) on a real Nintendo DS. You won't be disappointed.
Check your includes.
#include <nds.h>
#include <maxmod9.h>
#include <assert.h>
#include "sprites.h"
#include "ship.h"

/* Backgrounds */
#include "starField.h"
#include "planet.h"
#include "splash.h"
/* Sprites */
#include "orangeShuttle.h"
#include "moon.h"
/* Sounds */
#include "soundbank.h"
#include "soundbank_bin.h"
This is the final iteration of the Orange Spaceship demo that we will cover in this edition of the manual. Compile it and enjoy the fruits of your labors. Mmm, tasty. You should hear a nice sound when you press the thrust button. The game output should now look like the screen shots in Figure 9.1, “Flying around in the Orange Shuttle, with sound!”.
I hope you've enjoyed reading this manual as much as I've enjoyed writing it. I hope it has helped you to learn the basics of Nintendo DS programming, and if not, that it has pointed you in the correct direction. I wish you luck in all your future projects and endeavors.
Feel free to contact me mailto:jaeder@patatersoft.info, if you need any help or have corrections or suggestions.
I'd like to offer special thanks to all those who have taught me these past few years about Nintendo DS programming. I apologize if I've left anyone off the list who has helped me. Special thanks to:
John Haugeland
Martin Korth
Dave Murphy
Liran Nuna
Thorsten Lemke
Tobias Weyand
Shaun Taylor
Bryant Poffenberger
Hollis Jacobsen
Jeff Katz
James Zawacki
Michael Noland
Jasper Vijn
Jason Rogers
Christopher Double
Matt Luckett
Mathias Onisseit
Jaeden Amero is currently a multi-platform driver developer at National Instruments in Austin, Texas, USA. He graduated in December 2008 from Brigham Young University. He enjoys programming the Nintendo DS and Game Boy Advance, FPGA coding, unicycling, and playing the accordion in his free time.